I like using Microsoft’s Hyperlapse Pro application in Windows to make cycling or driving videos a bit easier to absorb. I’ve used it a number of times in Windows 10 without issue. Recently when trying to load a new video, the application would say “Opening Video” and just stay like that indefinitely. Slowing eating all the RAM your computer has to offer.
Initially I though this was because I was loading an hour+ video, so I tried with a 15min version of the same video, but got the same issue. Some googling shows a number of known issues, the suggested resolution is to open Windows Media Player and accept the licences proffered.
However my computer didn’t appear to have WMP installed. So I assumed this was a Windows 7 specific issue. Further searching didn’t reveal anything concrete, so I found a way to install WMP on Windows 10. After this I opened it, accepted the licences and Hyperlapse worked perfectly! I don’t understand what Hyperlapse was doing before hand, and why they don’t have a popup telling you what to do, but that’s the way it is.
tl;dr:
Open Windows Media Player and accept licences.
If WMP is not installed, do the following:
Start Menu > Settings > Apps > Apps & Features > optional Features > Add a feature > Windows Media Player
Open Windows Media Player and accept licences.
The Hyperlapse algorithms do a great job of smoothing out moving videos, giving a nice panning motion. Example:
I liked cycling. I liked Belgium (from what I knew of it). I figured I’d like cycling through Belgium. And I did. With a friend’s wedding scheduled in the low countries, it seemed like the perfect excuse to do some exploring by bicycle. We say exploring, but due to Schengen Visa requirements, exploring was relegated to the brief time spent each day getting from our planned start to our planned end.
Many people cycle around Europe every day. Some of them even do it for fun. Belgium makes this even easier, regardless of cycling proficiency, by being pretty flat, and having all its towns very close together. This is not necessarily specific to Belgium, but that’s where our friends were getting married, so it was convenient.
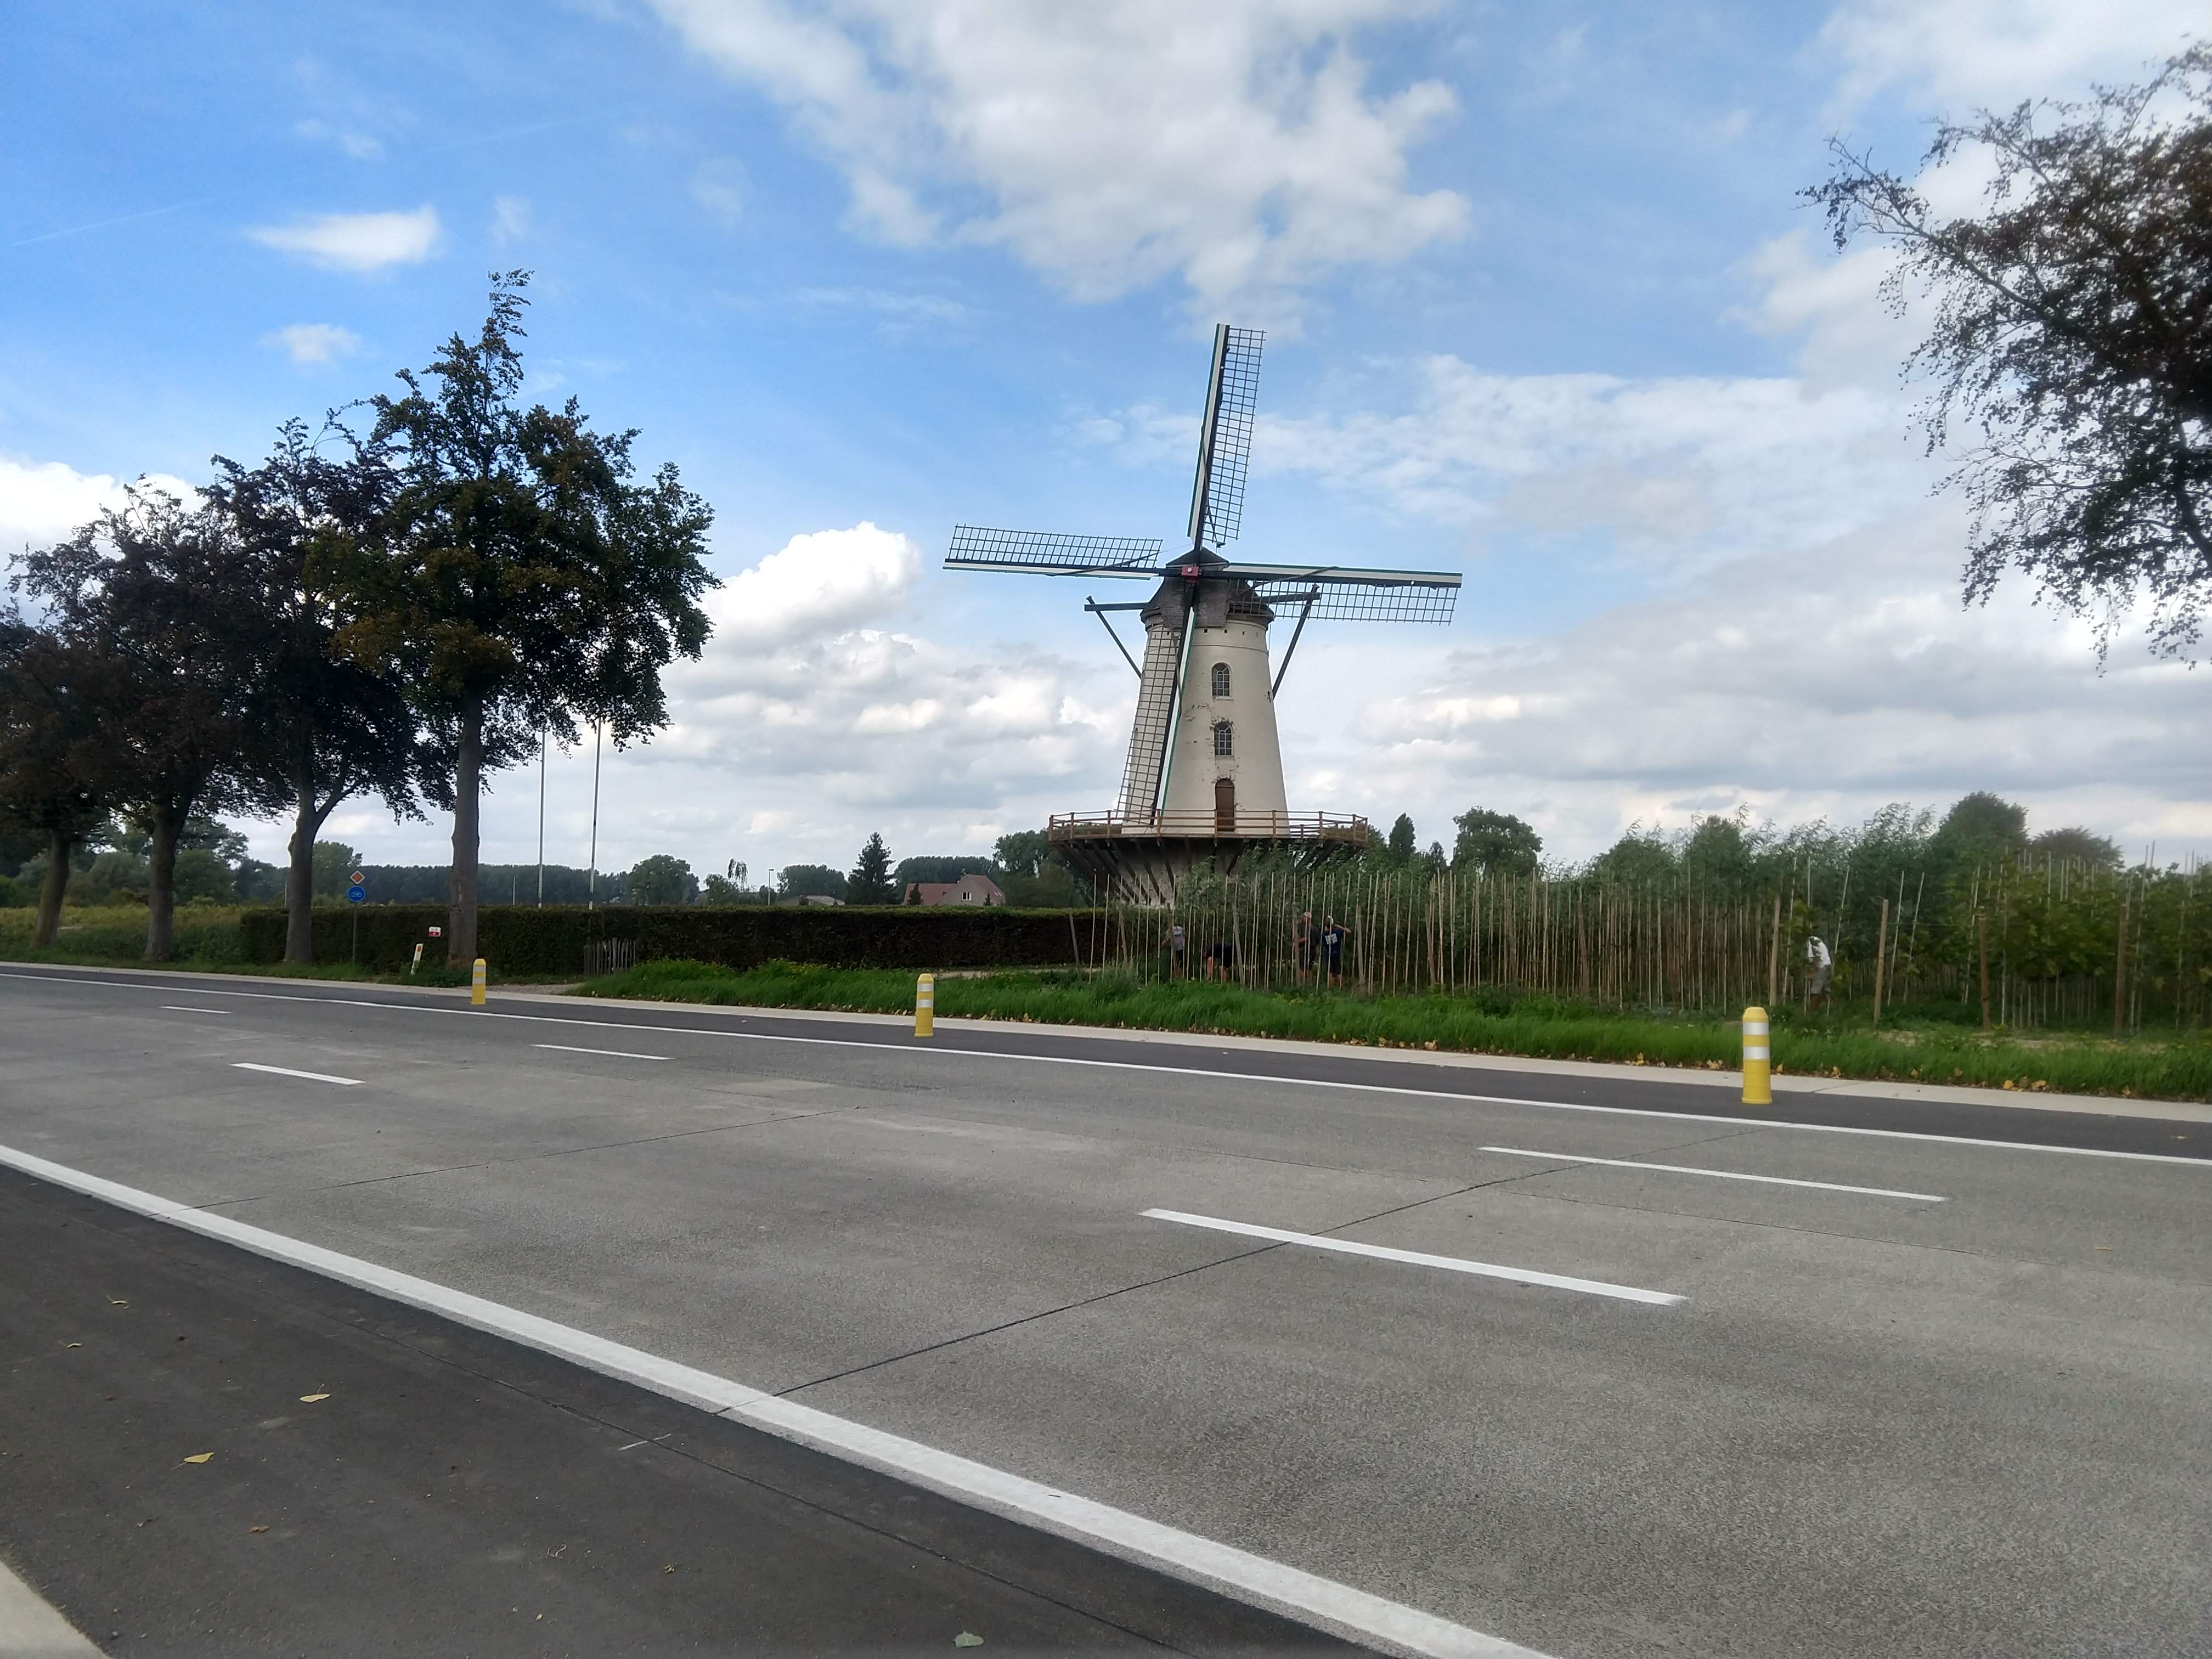
Belgium has windmills too
There are a number of companies which offer various packages for doing cycle tours throughout Europe. Some can be in groups, others can be self-guided. There’s also great variety of choice in the location, distance, support and accommodation packages on offer. And one day I’d love to try some of them, however we were limited.
We didn’t have a lot of time. We wanted to do 3 or 4 days of cycling max. My wife and I also wanted to do this trip by ourselves. We also wanted to start in Brussels and end somewhere else. Ultimately we were too picky. While there are lots of one-way routes on offer, they were generally longer. So we were left to our own devices.
If you’re hiring bicycles, not from a tour group, you’re required to return your bike to the start location. With train systems as they are in Europe this isn’t a major issue, as you can schedule your last day to be a train trip back to where you started, and just chuck your bike on the train. This also allows you to leave baggage at a hotel, in case you have something, like a suit, that you don’t want to cram into your panniers.
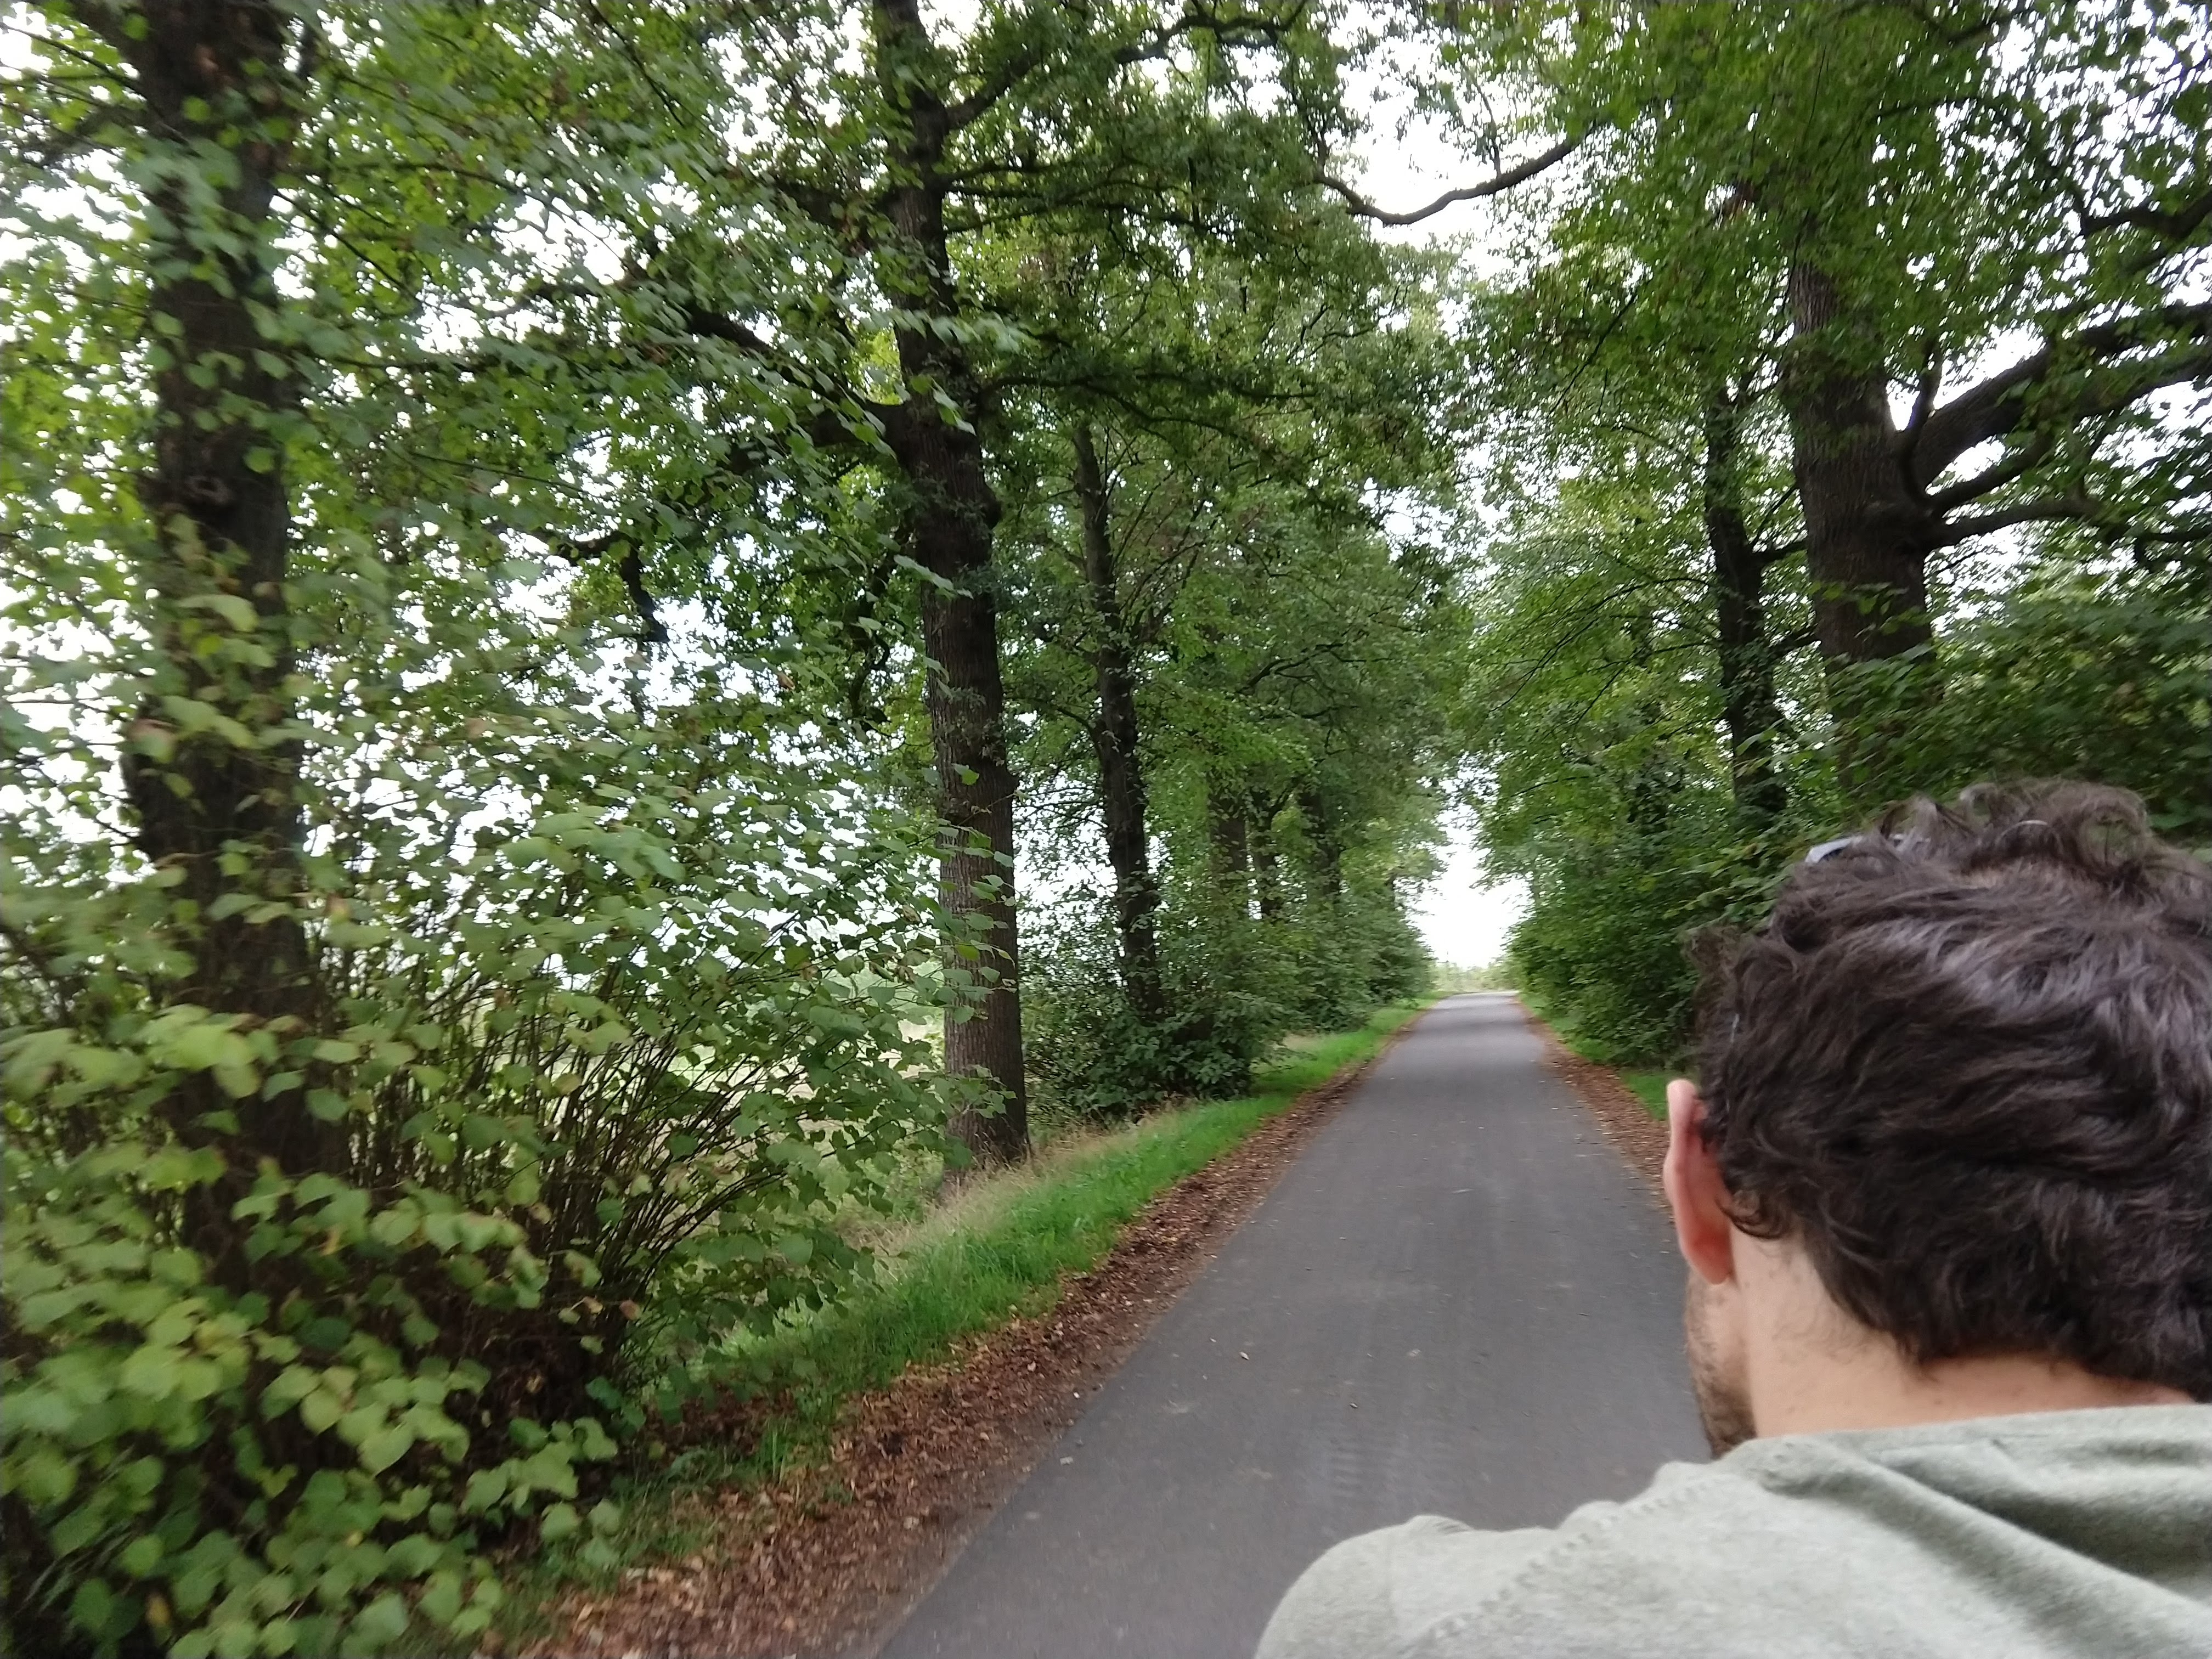
Avenues all to ourselves
Because of our time restriction, and for simplicity’s sake, we eventually decided to do a short 3 day tour. Starting and ending in Brussels, our first day we cycled to Ghent, second day on to Antwerp, and on day three returned to Brussels. We used Cyclo, a Brussels based cycling organisation with several locations, to obtain a bike, and were overall happy with the experience.
The three cities we chose were all roughly 50km apart in a nice triangular formation, which for regular cyclists is not a terribly long distance. In fact it’s a pretty comfortable distance. It’s far enough to convince you’ve done some work and deserve that delicious Belgian beer and waffle, while also getting you to a completely different place in the country, and also not taking the entire day to do it. So what did we do.
The Bike
You may notice the term ‘the bike’ and not ‘bikes’. This is because we decided to save a bit of money and hire a single tandem, as opposed to two bicycles. I also cycle more than my wife, and figured the trip would be more enjoyable for both of us if we shared a tandem, instead of having individual bicycles.
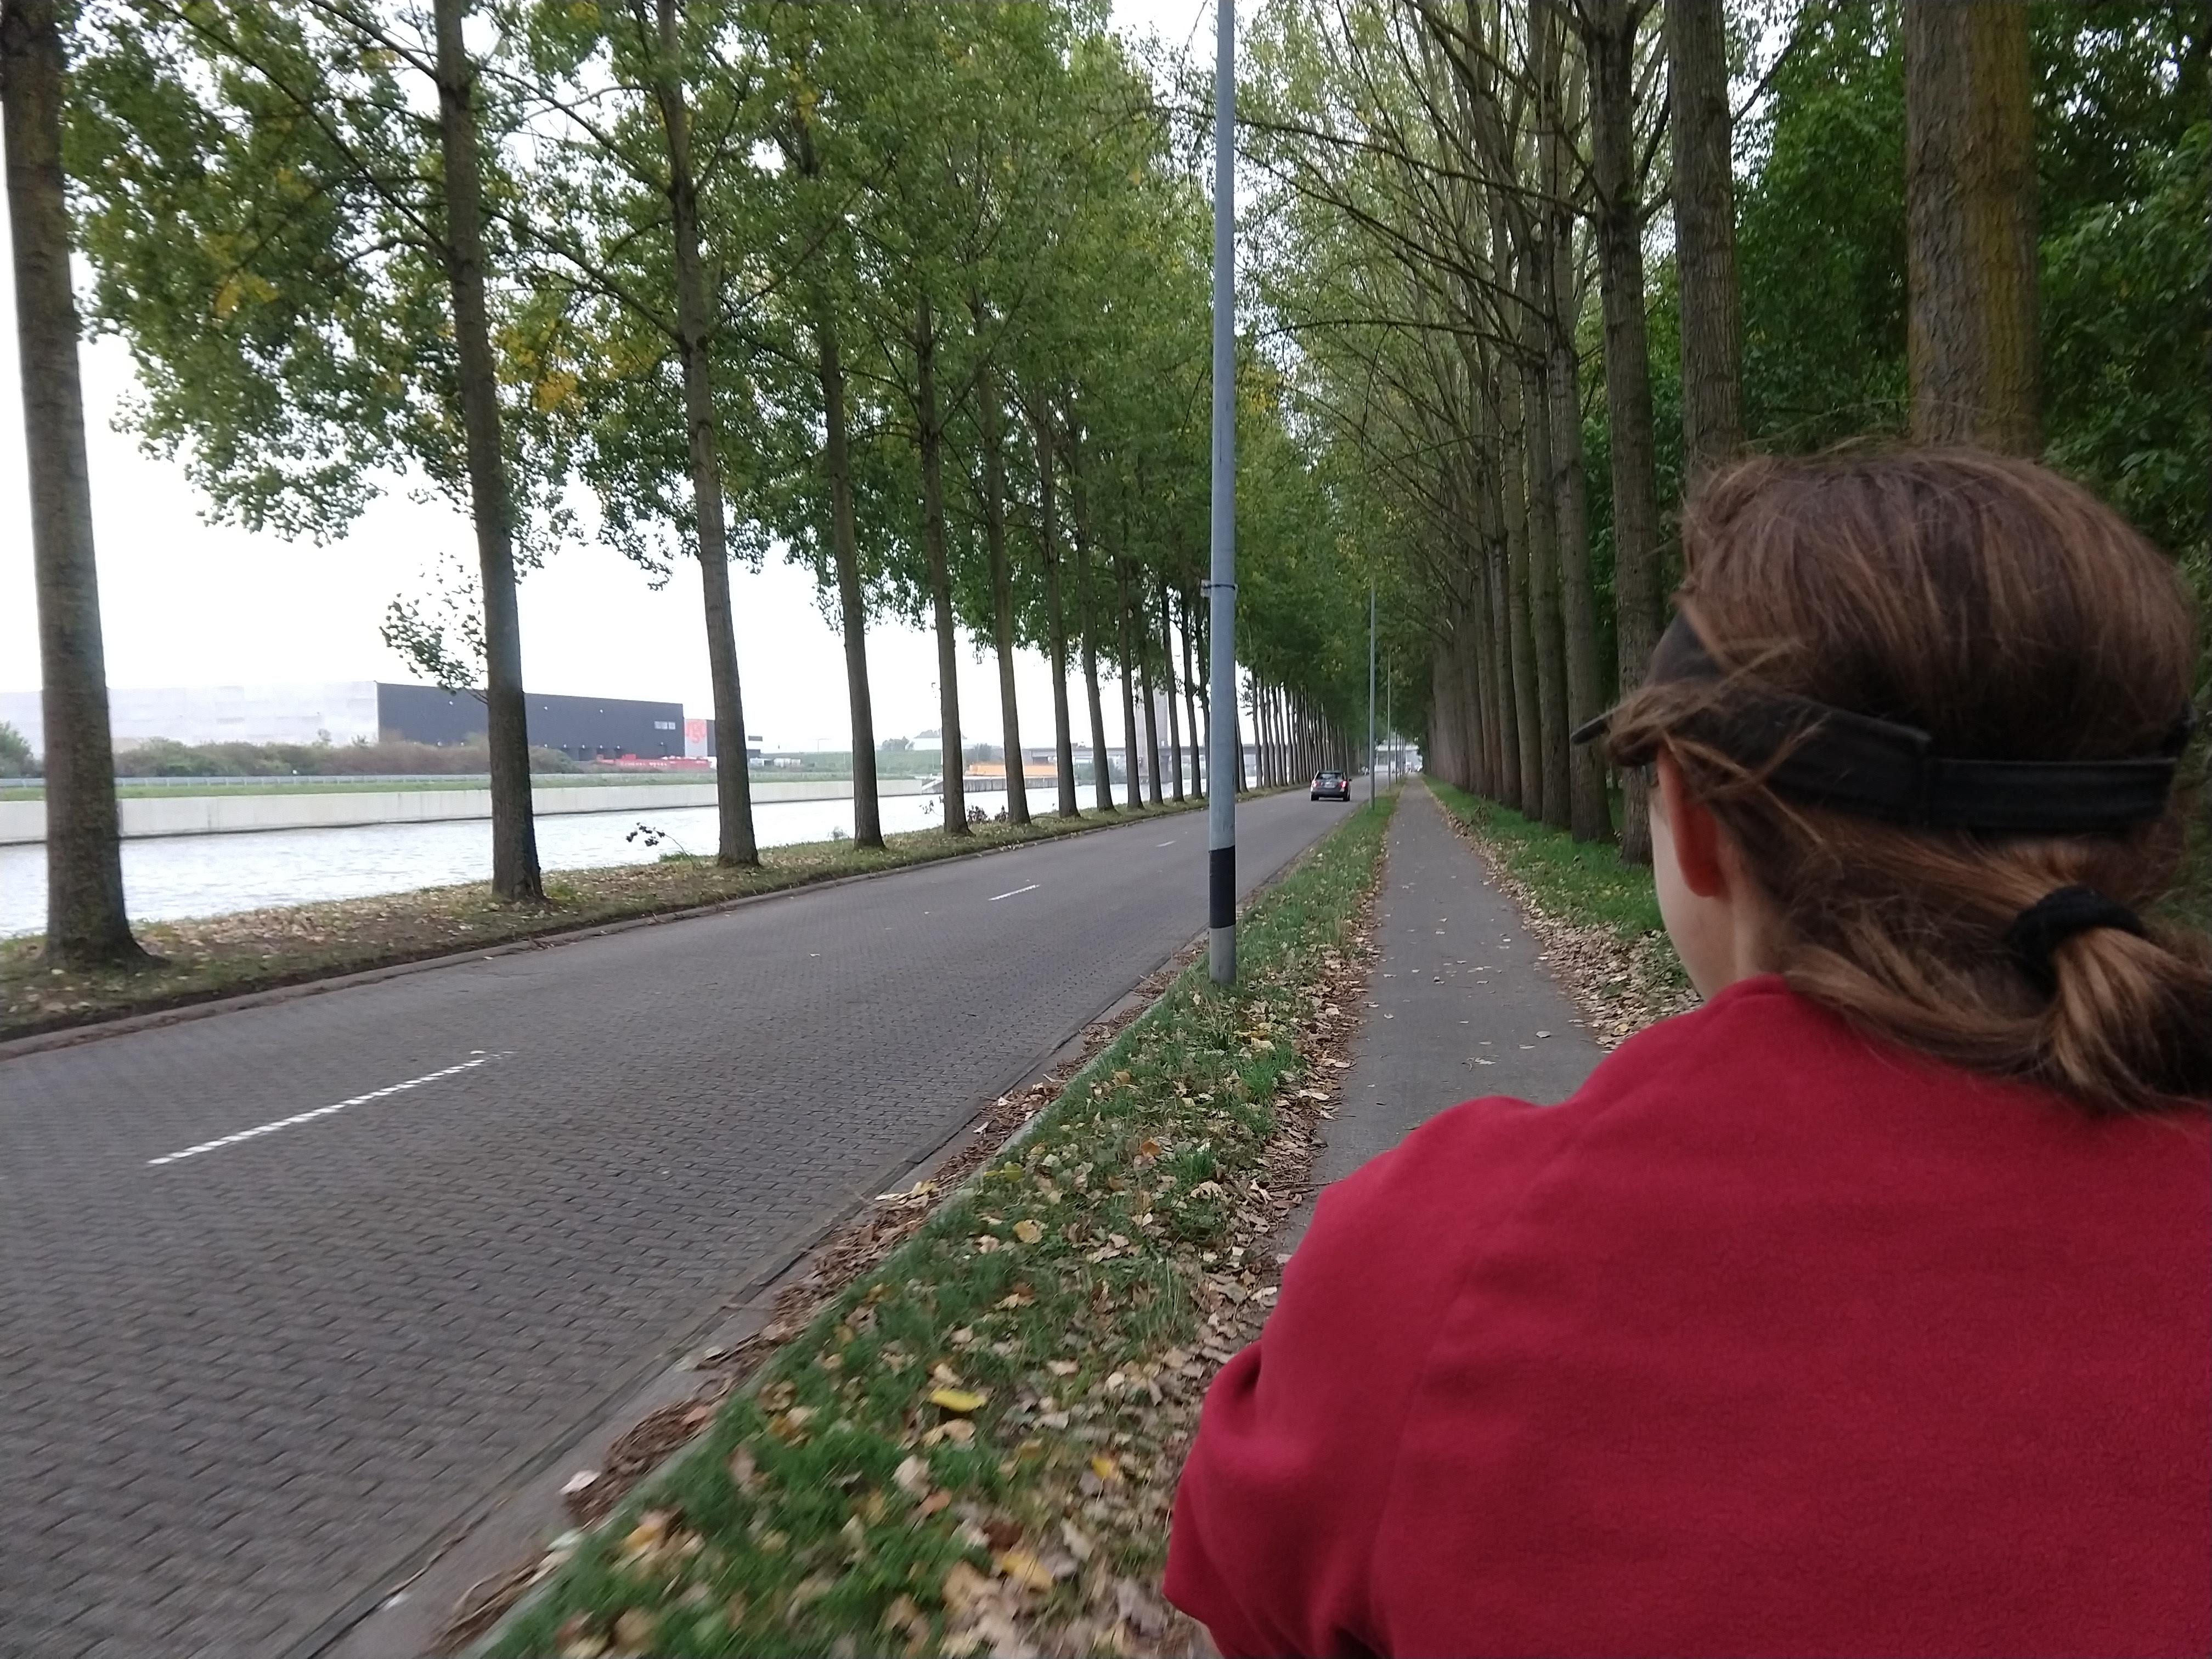
Sometimes we only got a path to ourselves, and not a whole road
This was not the wrong decision. But we’re not sure if we’d do it again. Cyclo were able to provide us a perfectly decent tandem (it even had front suspension). There were one or two niggly things on the bike which we only picked up once we were far away from Brussels. It didn’t stop us, and the problems weren’t tandem specific, but it slightly affected our experience.
Firstly, I am not short, and rental bikes are not made for not short people, particularly one-size-fits-all tandems. The gears on our bike weren’t properly tuned, and the rear seat kept sliding down, no matter how we tried to tighten it. It also had a kick stand which loosened, and due to the length of the tandem would often scrape things while riding. The routes we ended up riding also involved more ‘rustic’ paths than we had anticipated, for which a tandem is not ideal. Also cobblestones. However this is perhaps again, no a tandem specific issue.
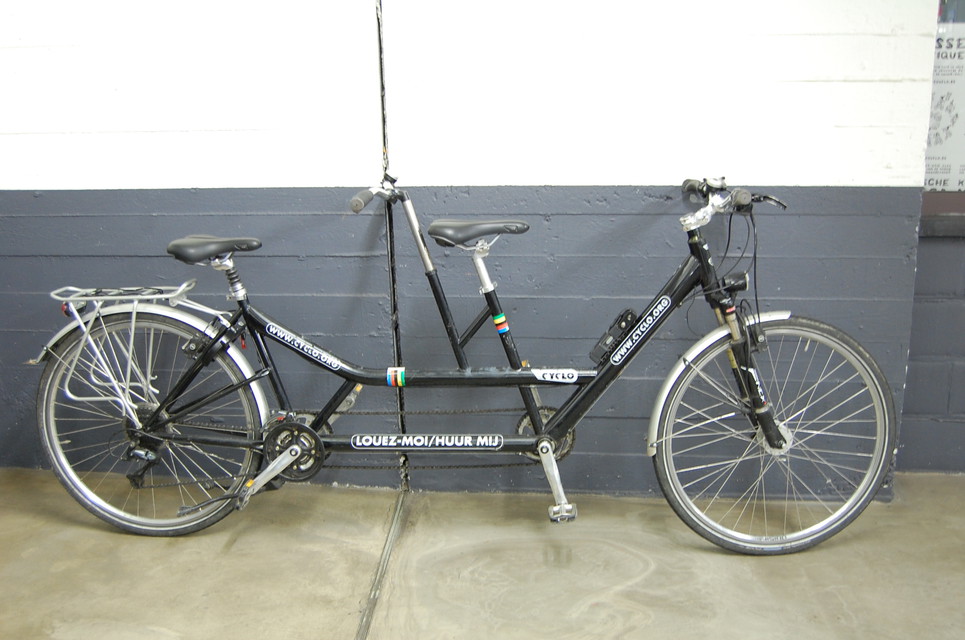
Our bike looked something like this
The tandem was fun though. It was fun to be together the whole time. It was fun to ride at the back at times. It was fun to have someone taking photos and navigating while the person in front could continue focusing on the cycling. We didn’t get upset with each other, or have any specific bad experience on the tandem, but at the end we both agreed we’d rather have been on our own bikes.
But wow, as flat as Belgium is, it’s a different ballgame climbing a hill with another person, panniers, bike locks and a (allegedly) 23kg bike.
Route Planning
Because this is Belgium, you can get away with Google Maps, and for getting out of cities, this is definitely what I’d recommend. Our first day we left later than we would have liked, and had to get to Ghent by a specific time, as such we decided to just follow Google Maps. And it works. But Google Maps takes you on the straightest easiest route. Also the least interesting, and least pretty route. We finished the first day and were a bit disappointed. We were hoping for some nice Belgian countryside, but we mostly just rode next to a B-road for 50km.
Thankfully there’s fietsroute.org. They are an amazing resource for all things cycling in Belgium (fiets is Dutch is for bicycle). Along with general information and suggested themed routes, they also just have a route planner letting you select a start and finish point, while it generates the best route.
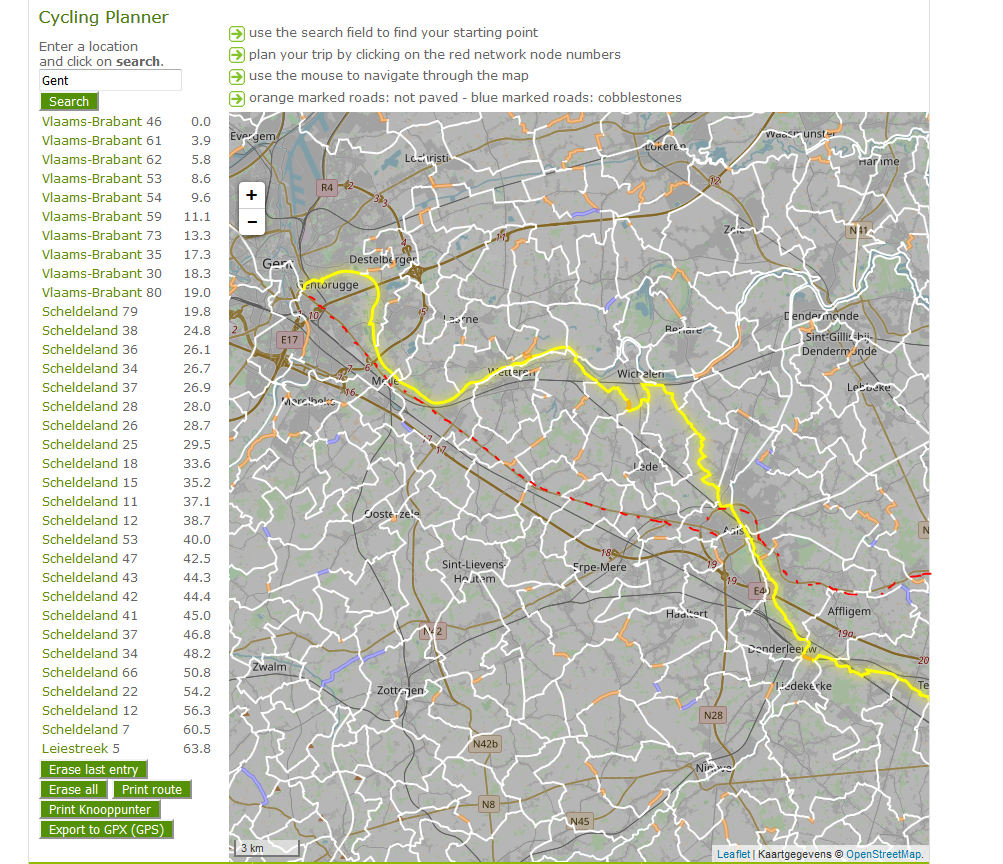
The Belgian cycling routes are set out in nodes (an intersection where multiple routes meet). At each node there are signs pointing in the direction of the next node. And along each stretch, there are additional signs keeping you on track to the node you want. Fietsroute generates a route for you based on these nodes. It explicitly does not make use of main roads, as you can see in the below image, where the bicycle routes are overlaid on the normal street map.
Fietsroute generated route in yellow. Google Maps route shown in dashed-red.
Inevitably these routes end up being 20%+ further than the direct Google Maps option. But it’s well worth it. The routes it generates are far more enjoyable. Taking you through the countryside. On old farm roads, cobbled streets, and generally less trafficked and prettier areas. If you’re on a road bike, you may want to do a bit more work to ensure you stick to paved roads, as the first route you get may take you on some less than desirable paths (although these sections can be short).
Fietsroute provides a list of all the nodes (knooppunten) that you need to follow to get to your destination, and you can technically just follow road signs to these destinations. We found however it safer to download the GPX output and track those on a GPS. Most GPSs support this functionality, and there are several cellphone apps as well. We ended up using BikeGPX, which was sufficient for our purposes, if not perfect.
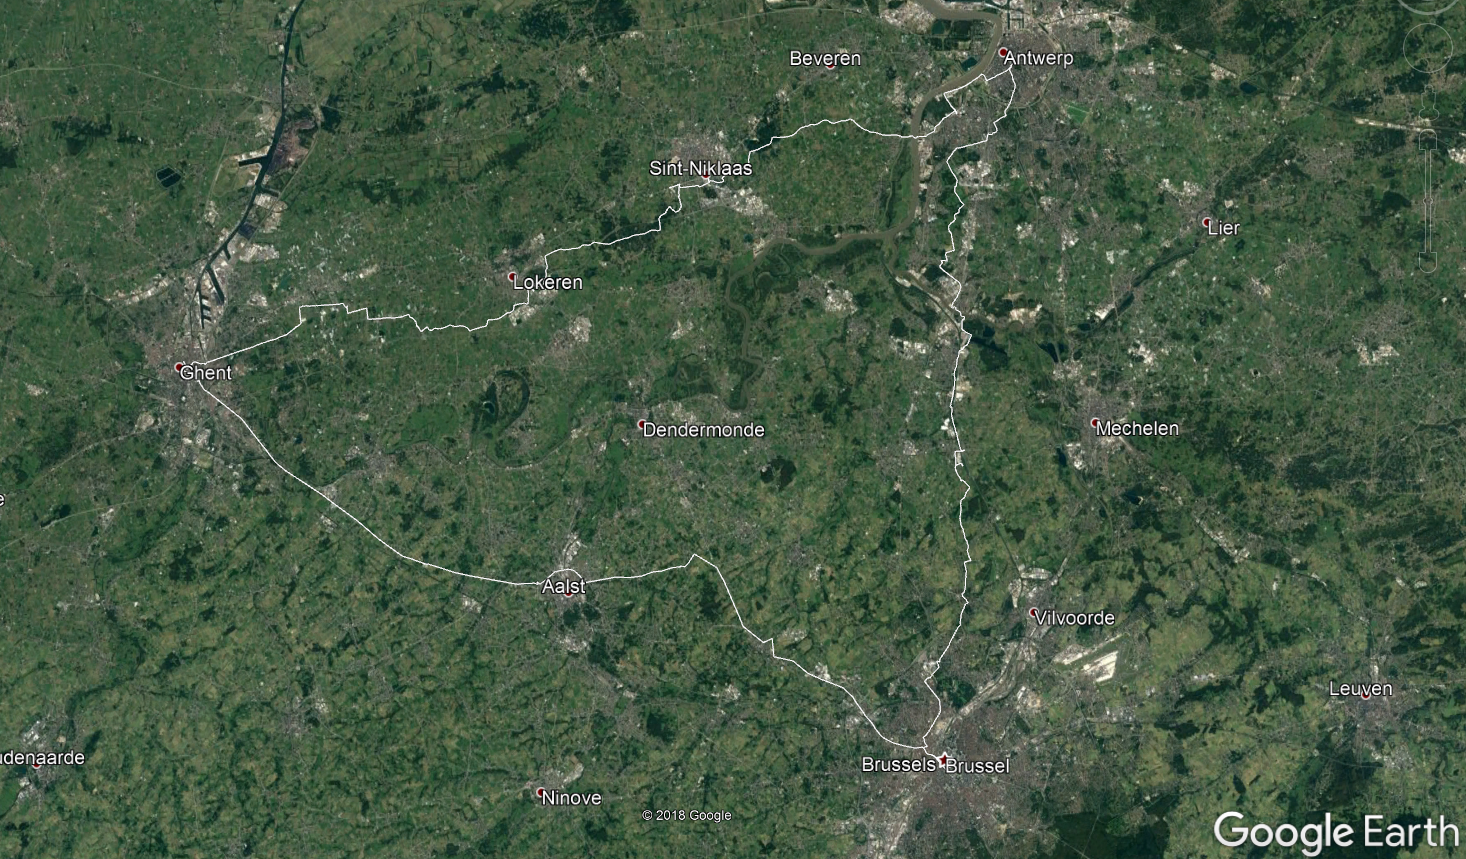
Below is the route we ended up taking. You can see on day one the route is fairly smooth as we followed Google Maps, and day two and three are more jagged, as we traced the Fietsroute suggested path.
Our route in white, leading us from Brussels to Ghent to Antwerp
Accommodation
You have many choices when it comes to accommodation. There are hotels everywhere. There’s AirBnB and multiple similar services. We ended up selecting places off Fietsroute’s list of BnBs.
Regardless of where you stay you’ll be able to lock your bike up outside for a night relatively safely. However the more expensive your bike, the greater chance of theft. The list of places on Fietsroute are listed specifically to cater for cyclists. So the places we stayed in Ghent and Antwerp both had place for us to store our bike overnight. Even our double length tandem. They also end up being a bit cheaper than regular accomodation.
But accommodation is really a small concern. Places in Belgium are so close together that you’ll be able to find somewhere to stay, no matter how far you decide to cycle each day.
Cycling through the countryside
Helmets
I grew up wearing a helmet while cycling, and continue to do so. We planned on picking up helmets along with our rental bike. However, when collecting our bike, there were no helmets. Not to rent, not even to purchase. The shop cited some off-hand liability reasons.
And so we joined the throngs of helmetless Belgians, cycling through the cities, cycling on country paths. Sharing roads with cars, enjoying other roads completely devoid of any traffic. And being very careful not to crash.
In and around Brussels, probably only a quarter of people we saw cycling had helmets on. And cycling between the cities reduced even that. Arriving in Amsterdam (which easily had four times as many cyclists) revealed only 1 in 100 people wearing a helmet. Although the risk of an incident with a car is far less than say Los Angeles, or South Africa, I would have still expected helmets to be worn for for events not involving automobiles.
But we survived, without incident. The flat nature of the country, and heavy load kept our maximum speed at any point to under 20kmph. Which certainly worked in our favour.
Additionally, it was just wonderful to cycle around Belgium. Vehicle traffic is clearly aware of cyclists, and you never have to worry about being cutoff, or impatient drivers trying to squeeze past. This was true in the cities themselves, which had bike lanes laid out all over, as well as along more remote roads. People may be in a hurry, but they respect a cyclist’s place on the road
Final Thoughts
Cycling is fun and a great way to see a country. Especially if you choose to take the backroads. So many pretty tree-lined avenues, where it’s just you cycling along. So many unexpected ferry crossings.
We knew going in that we wouldn’t have much time to explore each city. Considering we were planning on traveling for 5 hours a day, this only left a few hours each evening to explore, and considering we only had one night in Ghent and Antwerp, we didn’t see much. We cycled and walked the towns, but rarely went in to places like museums. That being said, they both have a lot to see just from the perspective of a cyclist or pedestrian.
We made sure to cycle past the Atomium on the way back. It’s like the Eiffel Tower of Brussels
50-60km is not a lot to do each day. But considering how close cities are, it would be nice to plan shorter trips each day. This would also allow you to leave later and arrive earlier in each place, giving you more time to explore. Alternatively staying an extra night in each location.
Getting away from rental bikes is difficult, but we’d at least try switch to single bikes, allowing for a more comfortable riding experience. We’d also pack helmets.
In closing, we’d totally do this again. Everything worked out great, and for our first such trip I’m not unhappy with any of our decisions..
With several different posts detailing some of the intracacies of the South African Driver’s Licence system, a number of questions get repeated. This post aims to address some of the most common questions.
Frequently Asked Questions:
I have an A, B, EB, C, EC, C1, EC1, Code 8, Code 10, code 14 licence, can I drive a motorbike, truck, articulated vehicle, quantum etc.
South Africa no longer has Code 8, 10 or 14 licences. In 1998 they were changed to the A, B, C, E format. You can see a comparison of before and after equivalents here. You can see what all the modern licence codes allow you to drive here.
I was arrested, charged, plead guilty to, arrested 2, 3, 5 years ago, can I get a PrDP?
You are unlikely to be approved for a PrDP if you were convicted, or plead guilty to any criminal offence in the last 5 years. That includes signing an admission of guilt. Usually this does not include ‘minor’ traffic offences such as parking or speeding tickets, assuming you were not convicted for reckless or negligent driving. If you were just arrested, or charged, but never actually convicted, you should be able to get a PrDP.
I am driving a bakkie, quantum, van, ford f150, truck do I need a PrDP?
It depends. If it’s a commercial vehicle, yes. If it has seats for more than 11 people, yes. If you are transporting people as part of your work, yes. Still not sure, read this article.
I have a code B, EB, C1, EC etc licence, and I want to get a code A, EC1 licence, etc do I have to redo my learners?
Yes. Regardless of what licence you hold, if you want to get a new licence of any code, you need to do a new learner’s licence for that code.
I am 18, 20, 25 years old, can I get a PrDP?
The minimum age for a PrDP licence is 18 for a G licence, 21 for a P licence, and 25 for a D licence.
The source for all answers is based on the National Road Traffic Act and it’s subsequent regulations and ammendments.
I’ve been working on a minor python project recently, and went back to my old friend TkInter. TkInter is the standard GUI library for Python. I had used it previously in another small project, so when I wanted to quickly get a GUI going for a project, it made sense to use TkInter. There are many other GUI libraries, but TkInter is supposedly one of the quicker and easier to get going.
TkInter has a number of shortcomings. It’s clunky and not completely intuitive. But the biggest issues that I experience with it is trying to get the interface to update from an outside perspective. My specific implementation required me to update about 20 values on the GUI by reading data from a serial port.
The easiest way to implement this is to make use of the TkInter Label widget. The Label is used for displaying any kind of text. A label can be linked to a TkInter variable, so that if you update the variable, the label automatically gets updated. The difficulty is that you need an event to trigger an update of the variables.
The way to get around this is threads. Python has built in support for threads, via the Threading class. And so you create a thread, and pass it the Tk variables and update them from the thread. This allows you to continue doing other things in the GUI, and still have your thread run. Or does it.
The immediate issue is with how TkInter queues up tasks. Because the label uses Tk variables, you can only update them by calling a set method. Not just by declaring the variable equal to a value. As such this set gets added to a queue. I found that when I clicked a drop down menu (Tk.OptionMenu), my updates would pause. My thread would effectively pause as it waited to be allowed to call the variable set method.
This was not the end of the world, and I probably would have left it like this if I didn’t continue to have the program crash unexpectedly. It would happen often, but at different times, and only when I was interacting with another aspect of the GUI. For example, when I clicked a button or selected a menu item. The program would freeze, causing the python itself to crash, and not reporting any error.
I battled to find much info on this topic. All I’ve been able to come across is the repeating statement that “TkInter is not thread safe” and that you shouldn’t try to access TkInter widgets, except from within the main thread.
There are a couple ways around this. What I ended up using is the TkInter after method. It’s janky. But it works, and has proven reliable. Since I made the change, I have not had my app crashing any more. Now I have a global variable to store the data from serial in. I have a function within my GUI object that updates the Tk variables from the global array. It then calls itself using the after method.
The after method adds a note to TK to do something after a specific amount of time has lapsed, and appears to operate much like an interrupt, ignoring whatever else I am doing and updating on schedule. I first came across the after method as described by Furas on StackOverflow.
Below is a summary of what I was doing before, and what I am doing now.
Before:
class SerialThread(threading.Thread):
  def __init__(self, gui_object):
    threading.Thread.__init__(self)
    self.gui = gui_object

  def run(self):
    #Read serial info
    self.gui.variable1.set(SERIALDATA)

class GUI():
  def __init__(self):
    self.root = tk.Tk()

    self.variable1 = tk.StringVariable(self.root)
    label1 = tk.Label(self.root, textvariable=self.variable1)

    label1.grid(row=1,column=1)

    thread1 = SerialThread(self)
    thread1.start()

 self.root.mainloop()

if __name__ == "__main__":
  GUI();
And after:
TempVariable = "XXXX"

class SerialThread(threading.Thread):
  def __init__(self):
    threading.Thread.__init__(self)

  def run(self):
    global TempVariable
    #Read serial info
    TempVariable = SERIALDATA

class GUI():
  def __init__(self):
    self.root = tk.Tk()

    self.variable1 = tk.StringVariable(self.root)
    label1 = tk.Label(self.root, textvariable=self.variable1)
    label1.grid(row=1,column=1)

    self.updateLabels()

    thread1 = SerialThread()
    thread1.start()

    self.root.mainloop()

  def updateLabels(self):
    global TempVariable
    self.variable1.set(TempVariable)
    self.root.after(10,self.updateLabels)

if __name__ == "__main__":
  GUI();
UPDATE – below code skips the global variable and uses a thread lock:
class SerialThread(threading.Thread):
  def __init__(self):
    threading.Thread.__init__(self)
    self.serial_data_to_display = ""
    self.lock = threading.Lock()

  def run(self):
    while True:
        with self.lock:
            # serial read stuff
            self.serial_data_to_display = "SERIAL DATA"
        sleep(0.1)

class GUI():
  def __init__(self):
    self.root = tk.Tk()
    self.variable1 = tk.StringVariable(self.root)

    label1 = tk.Label(self.root,  textvariable=self.variable1)
    label1.grid(row=1,column=1)

    self.thread1 = SerialThread()
    self.thread1.start()

    self.root.mainloop()
    self.updateLabels()

  def updateLabels(self):
    with self.thread1.lock:
        self.variable1.set(self.thread1.serial_data_to_display)

    self.root.after(10,self.updateLabels)

if __name__ == "__main__":
  GUI()