We purchased a second hand car a few years ago. When we got it, it came with one key, and no keyless entry remote. Some 2008 Hyundai Tucson’s came with a keyless entry remote, but there was no way for me to determine if our car had the necessary hardware. If it did, I could simply purchase a new key and get it re-programmed. However queries with Hyundai only resulted in new-car sales pitches, and I wasn’t going to risk wasting $100 to buy a key and get it re-programmed with no guarantee.
Instead, I installed a garage-remote receiver in my car. The car has central-locking which is triggered by using the key in the door. Using a remote controlled relay, one can send the same signal to the central locking system as the key switch does. I used an old receiver I had lying around, similar to this. There are many different remote control kits available that can be used here. The important things to check are that they will operate off 12 VDC and how much current the receiver uses when idle.
The ETACS (Electronic Time and Alarm Control System) in the Hyundai Tucson draws up to 4mA black current. That is, when the car is off. Ideally you want a receiver with a similar, or lower current draw. My receiver draws about 10mA. Not ideal, but I did the math and determined that as long as we drove the car once every two weeks, we shouldn’t come anywhere near to flattening the battery (less than 2 Ah per week).
The switches in the door keylocks simply short the signal line to ground to trigger locking/unlocking. I chose to use the passenger/assistant door key switch. If you use the driver door key switch, you may have to push the unlock button twice to get it to open, as when unlocking with the key, once has to twist the key twice.
All the connections you need are by the ETACS, and the ETACS also has space around it (in my manual transmission in any case) to mount the receiver.
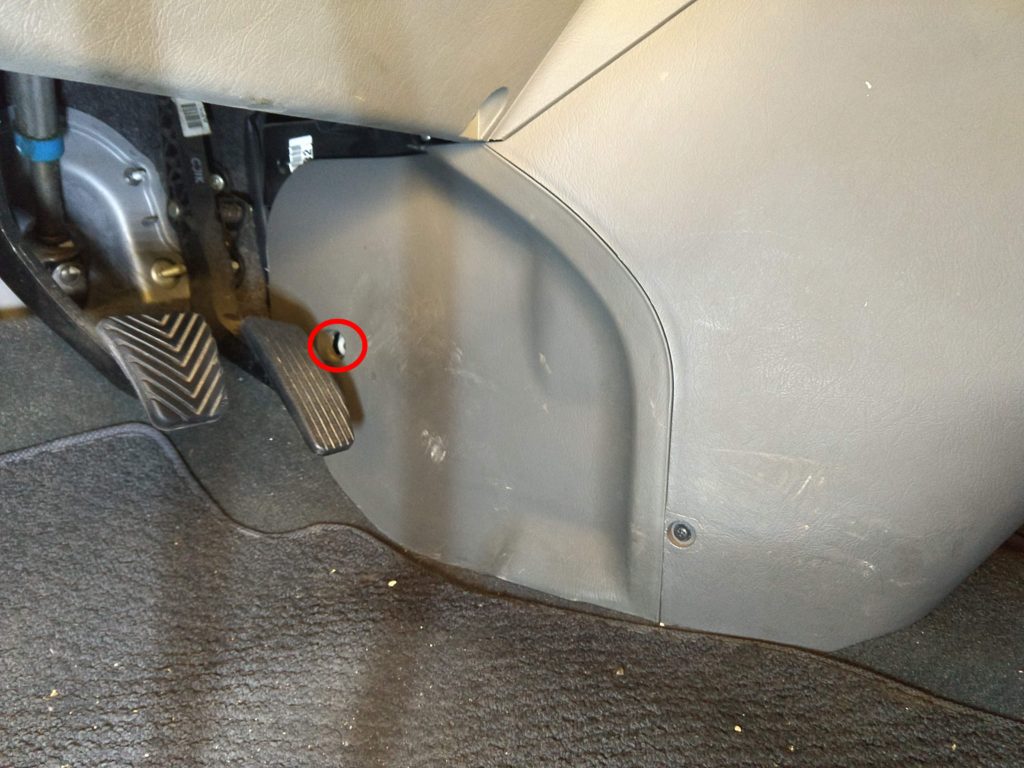
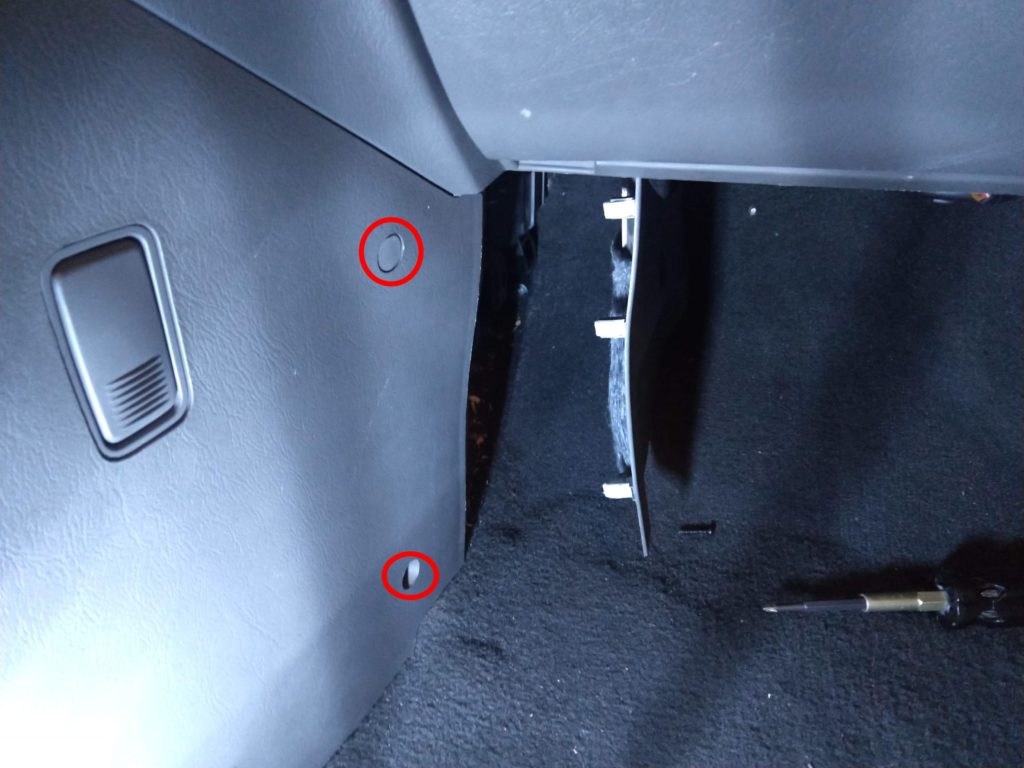
The ETACS is located below the gear lever. To access it, one has to remove several sections of fascia. You can see how to do that looking at the photos in the below gallery:
Undo screw on driver’s side.
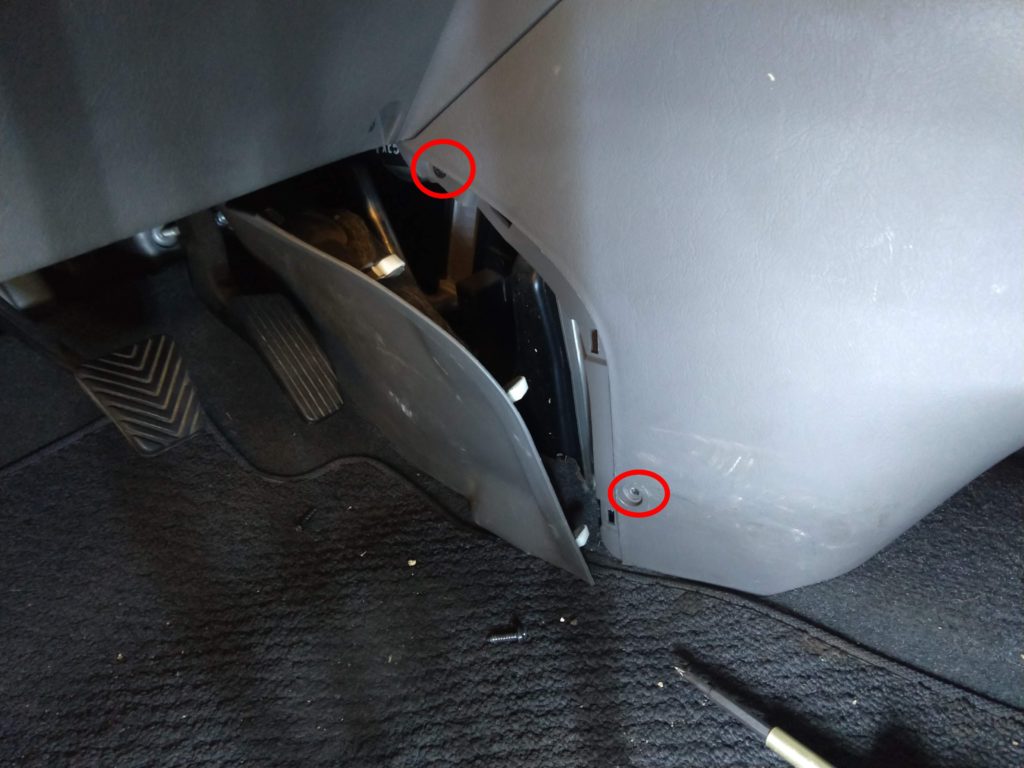
Pull front fascia away, unclipping three clips. Then loosen two screws.
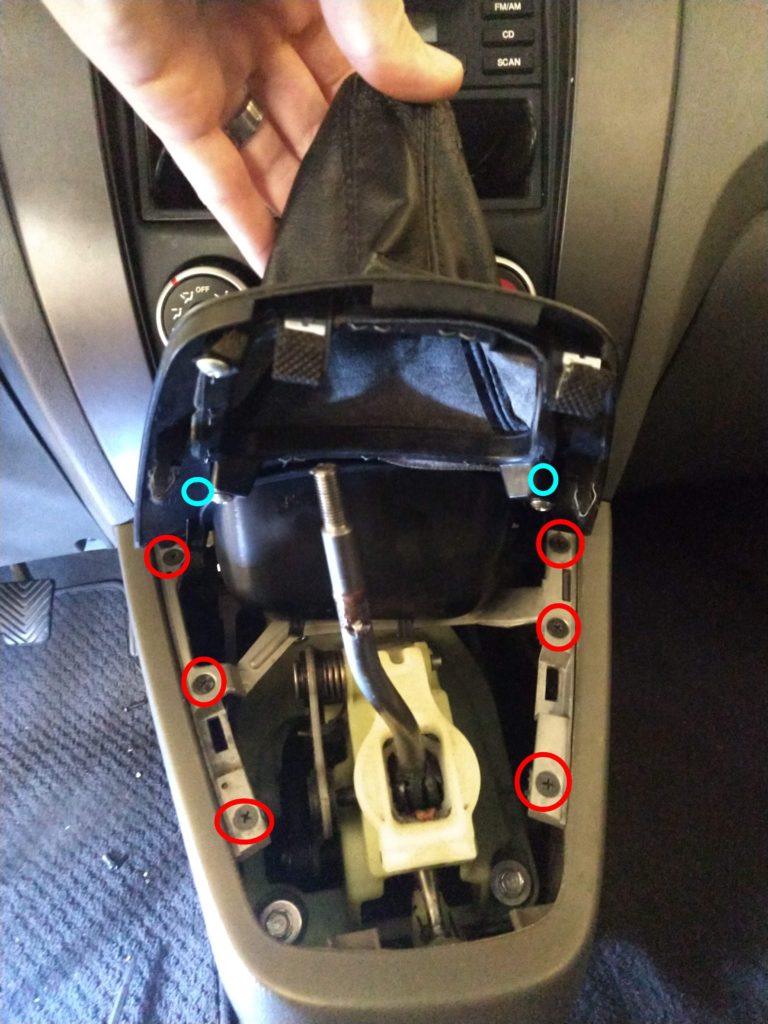
Unscrew gear lever head. Pull cover off. Loosen 8 screws (blue screws hidden in this photo)
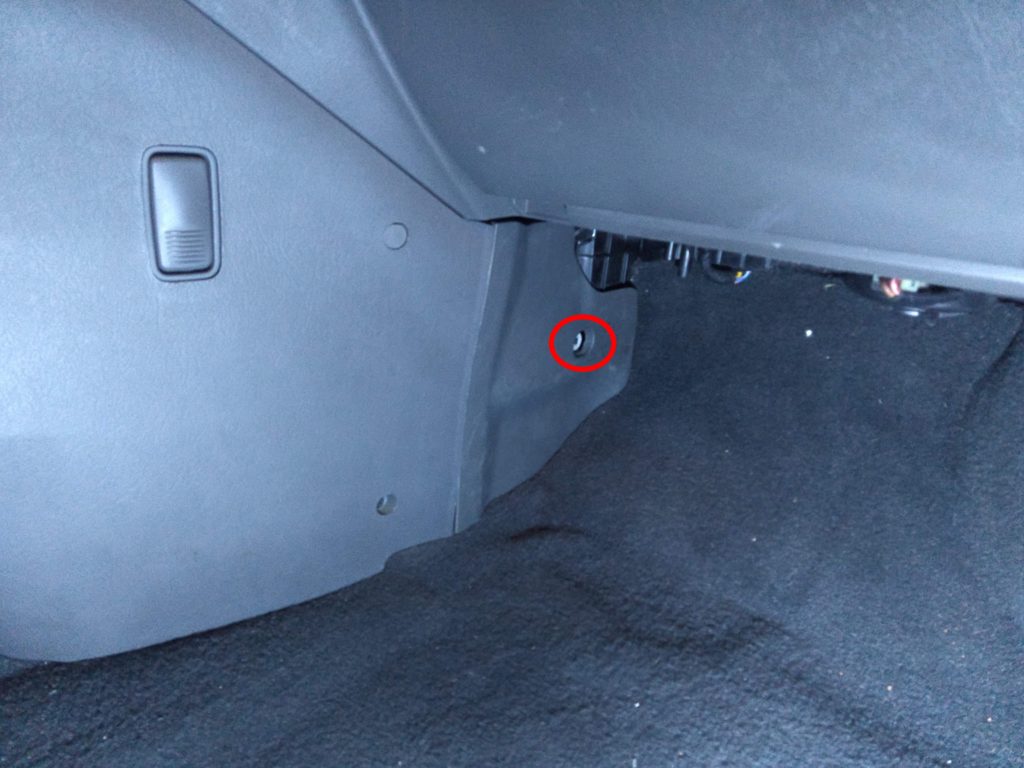
Undo screw on passenger’s side.
Pull front fascia away, unclipping three clips. Then loosen two screws.
Once all the screws are undone, you can remove the last section by pulling it away from the center console. There are hooks, but no clips, so it should come out fairly easily.
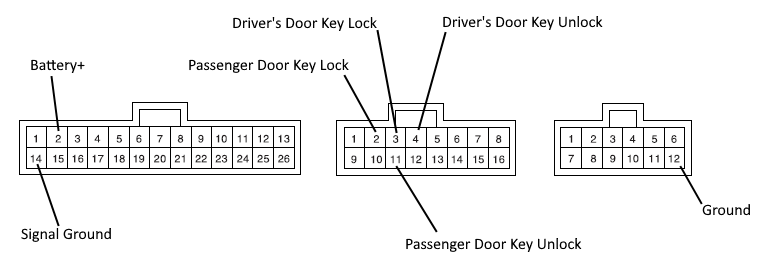
The ETACS has three connectors going into it. They are all clipped in place. The below image shows the important pins, as viewed from behind, the connector (direction from which the wires go in), when plugged in.
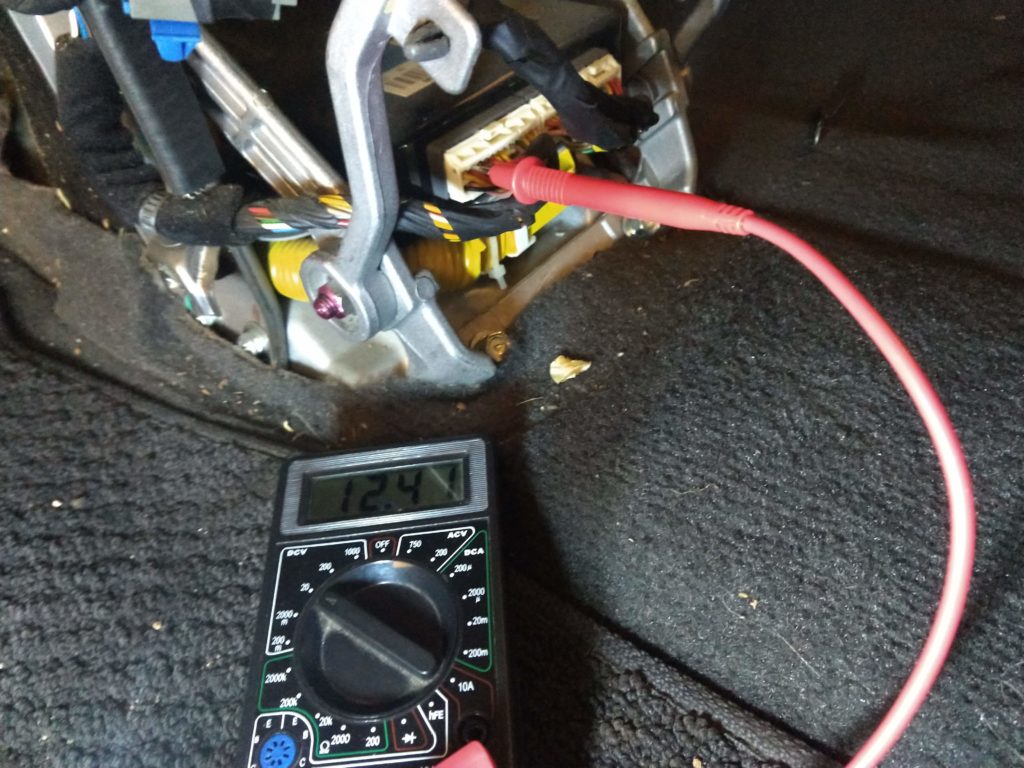
While your battery is still connected, check the voltage on each of the pins. Battery+ should read around 12.5V, while all the other ones should measure near 0V. Check for continuity between the Ground, Signal Ground and a grounded part of the vehicle. Then you can try locking and unlocking the car, by shorting the signal ground line and the applicable lock/unlock signal.
Once you’ve tested that these function correctly you should disconnect the battery from the car, and then you can unplug the ETACS to connect the necessary wires.
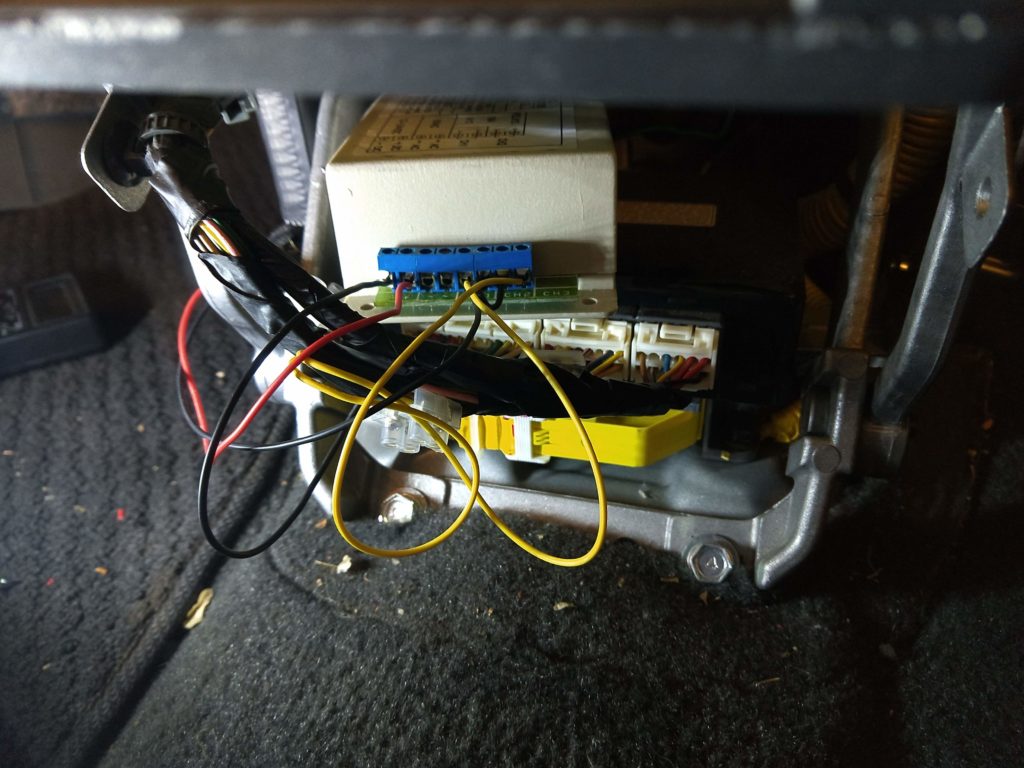
ETACS location with connectors
If you have the tools to solder or crimp the connections in, I definitely advise that. I used dual-row screw terminals, although I acknowledge they’re not the best option for auto use. Connect the Battery+ and ground lines to the power connection on your receiver, preferably including an inline fuse.
My receiver has two switches. Both of them are normally open, and when activated will connect two terminals. As such on the one switch I hooked up the lock and signal ground lines, and on the second switch I connected the unlock and signal ground lines.
Once connected, make sure everything is insulated, and connect it back up. Connect your battery again to test out your remote. If it works correctly, find a way to mount your receiver, using foam where applicable to prevent rattling. Add insulation to any of the wires which may rub against sharp edges.
Phantom vibrations are a thing. I’ve experienced them before. You feel a vibration in your pocket, reach for your phone, and realise your phone is actually sitting on your desk. But this was different.
After my phone updated to Android Pie, I started receiving notifications, but my watch didn’t indicate anything, and when I looked at my phone, it didn’t show any new notifications. This happened multiple times a day, much to my annoyance.
There were two steps to sorting this out, first figuring out what was causing the notification, and then figuring out how to stop them occuring.
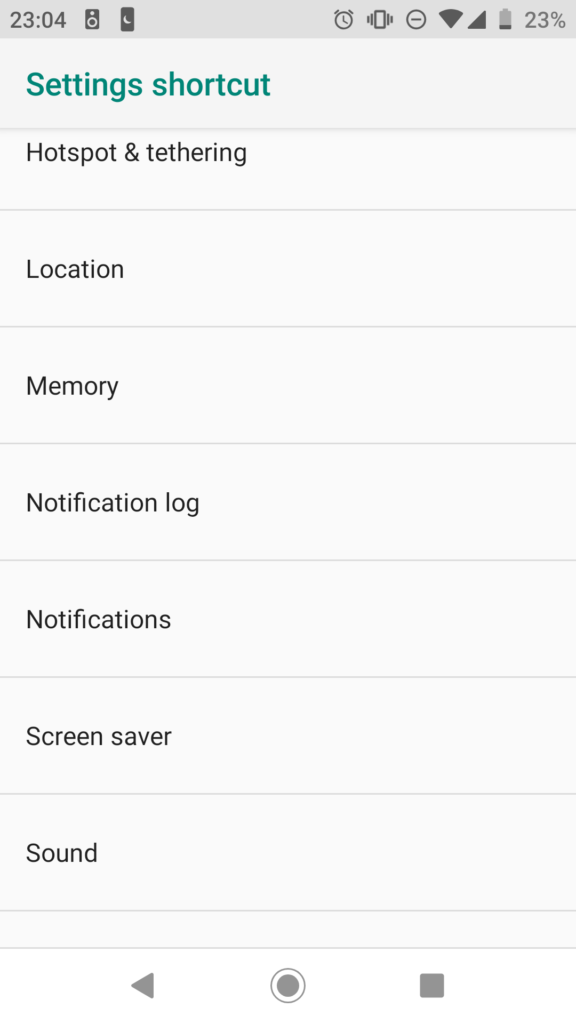
Android lets you put a widget on your home screen that will show you a history of all your notifications. Add a Settings widget, and select Notification log from the list (I learned about this on reddit). Now wait.
Selection Notification log from the Settings widget options list
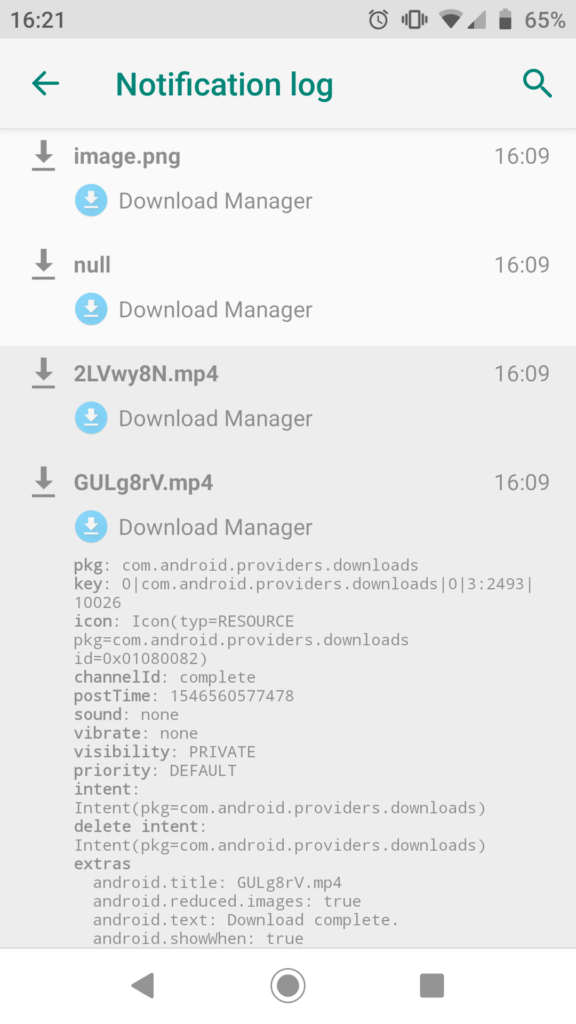
When you get a notification, you can open the notification log, and view what it was that happened. In my case it was my Download Manager. Which is weird, because it’s telling me about things I downloaded days and weeks ago. Annoying. But at least we know what it is now.
Notification log showing the most recent notifications.
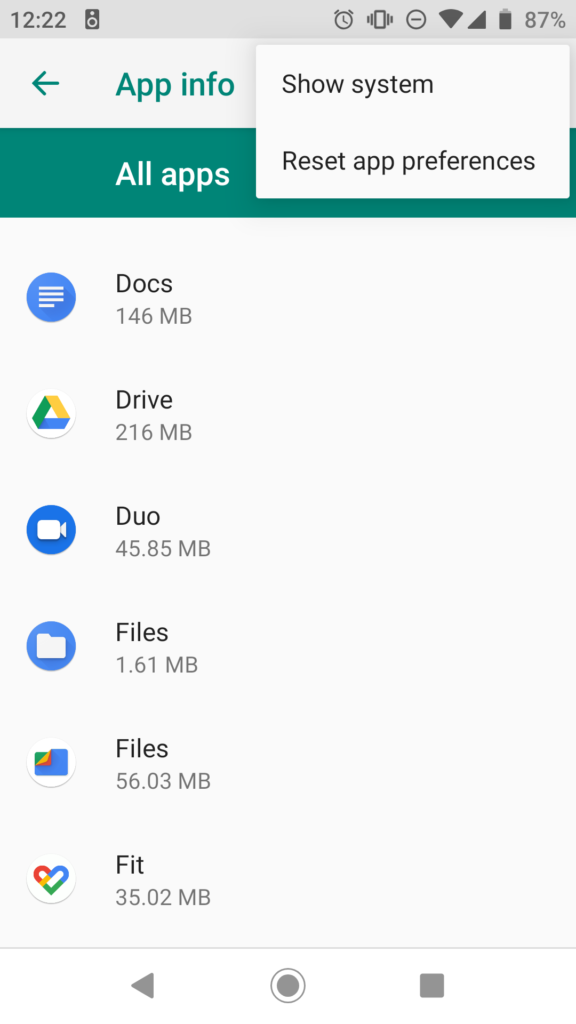
The normal way to turn something off is to open the app, and go to its notification settings. However the Download Manager is a background app, so instead you go to Settings > Apps & Notifications > See all apps, then tap the menu button in the top right, and select Show system.
Get Settings to show you system apps.
You can then select the offending app, and change it’s notifications settings. In my case I just stopped showing notifications for the Download Manager app.
It’s been almost two weeks now, and I haven’t had another occurrence of the phantom notifications. After experiencing them almost daily, this is quite an improvement.
For every day that we spend in the US, we add another location to our list of places we want to visit. As such, it’s nice to every now and then actually tick something off the list.
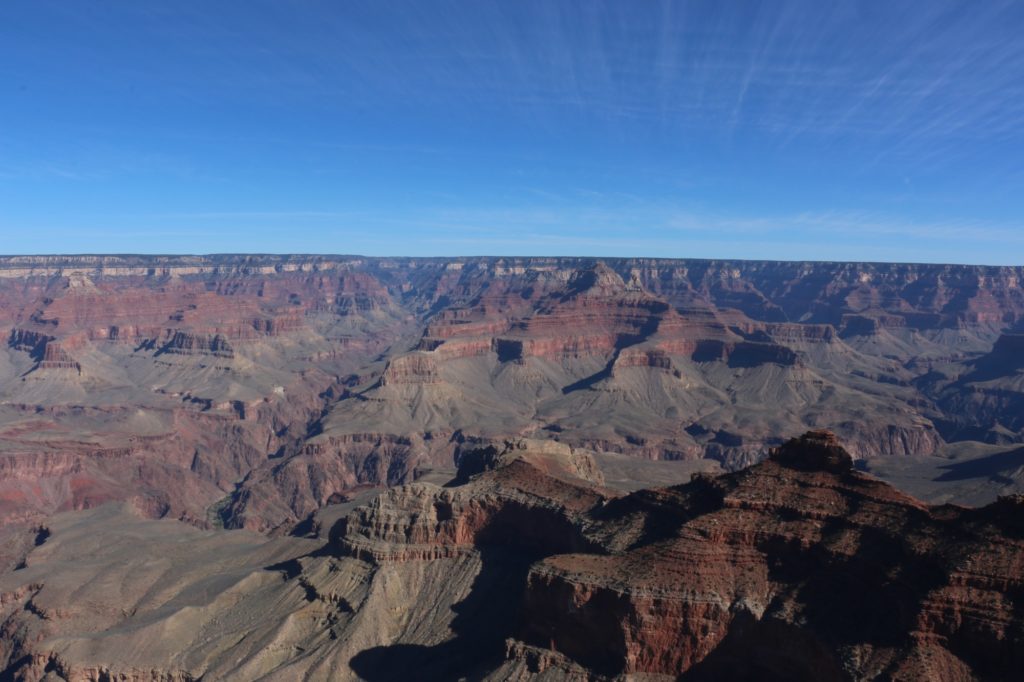
Earlier this month we were able to welcome my parents to the US for a short vacation. We used this as an excuse to do a trip out to the Grand Canyon, and see just a few of the many sights Arizona has to offer.
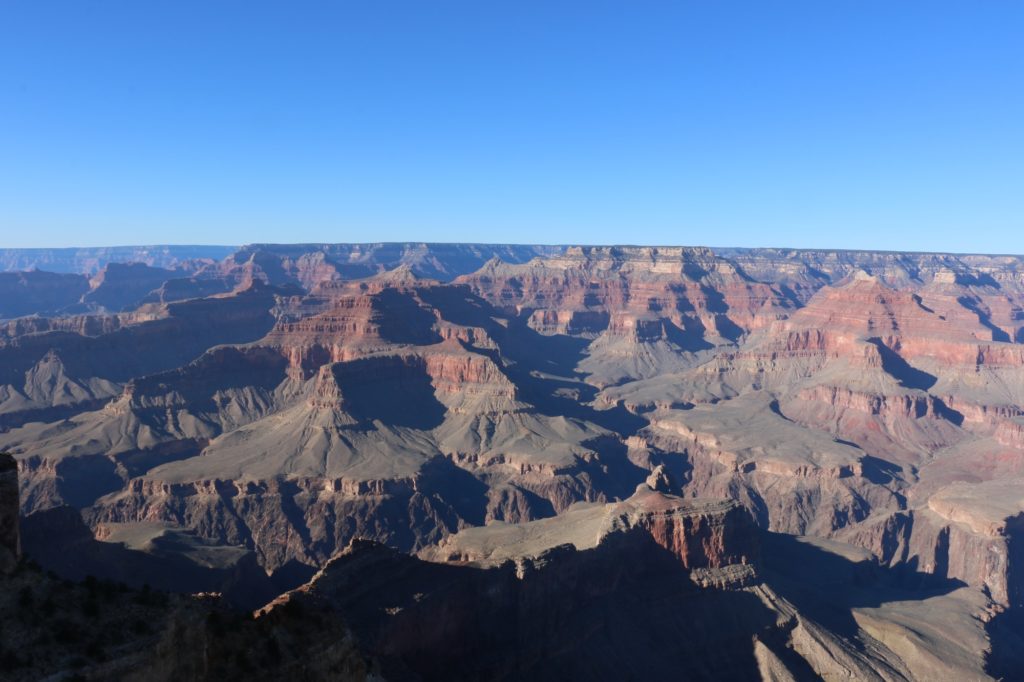
Grand Canyon National Park
The Grand Canyon is a well-known international destination, and for good reason. Growing up in South Africa I had the opportunity to visit Namibia, and hike through the Fish River Canyon. With majestic views and beautiful scenery, it’s a sight to behold. But as the saying going, everything’s bigger in America.
We’ll skip around the confusing definition of what a canyon is, versus a gorge, or valley, or kloof, or poort, or the many other words with similar but different meanings, and just accept that the Grand Canyon is much larger than the Fish River Canyon, but by no means the largest in the world, or even the Americas.
Stretching almost 540 km, the canyon reaches depths of almost 2 km, with rims as far apart as 30 km. It is truly grand to behold. The most common place to visit is the South Rim of the Grand Canyon National Park. And this is where we ended up. November is considerably cooler than the Summer months, and although snow is always a risk, we were blessed with very mild conditions. The cold weather does ensure far fewer visitors to the park compared to the summer months.
From LA it’s a pretty easy 8 hour drive to the Grand Canyon. There are different routes you can take, but not a lot to be seen if you’re trying to do a one day trip. Above you can see our full route for the trip. Green marks a place we overnighted, yellow marks a POI we stopped at and blue is the route we drove on a particular day.
We spent two two full days exploring the Grand Canyon National Park (three nights), opting to stay at an AirBnB just out side the park instead of the variety of hotels within the Park. Camping is on the list for next time, but wasn’t feasible with overseas guests. Instead we got a spacious, woodfire heated cabin, miles away from anyone, all to ourselves.
Two days is certainly not enough time to see everything in the park (and we were only looking at the South Rim), but we tried to see as much as we could. Day 1 we just spent getting our bearings. Hiking out to Yaki point in the East, returning via shuttle for lunch, and doing a combination of hiking and taking shuttles along the rim path to Pima Point in the West. Getting to take in all the splendour of the canyon, spending plenty of time stopping for photos.
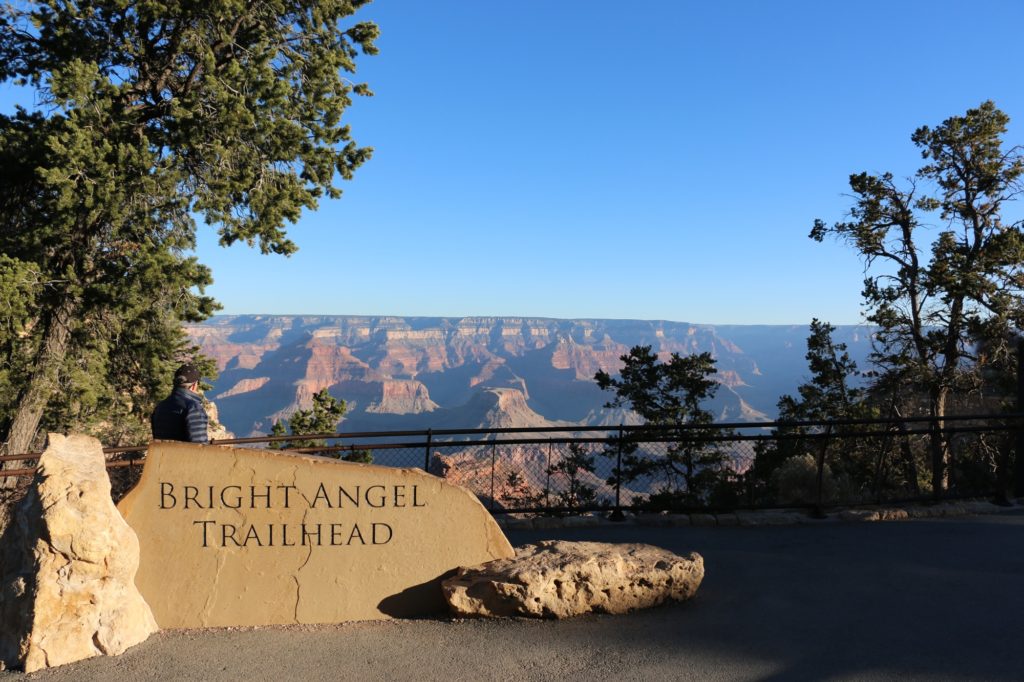
Bright Angel Trailhead, Grand Canyon National Park
For day 2, we really wanted to get into the canyon a bit. The easiest way to do this is the Bright Angel Trail. Starting in the Grand Canyon Village, the trail drops down past two rest stations and onto a small plateau. From there it carries on through the Indian Garden where it splits. One route takes you further to Phantom Ranch (on the north side of the Colorado River), and the other to Plateau Point ( a viewpoint into the canyon).
The National Parks Service (NPS) have to deal with hundreds of thousands of visitors coming to the park every year. All of them wanting to see the canyon. Many of them of questionable fitness. Unlike most hiking trails which make you do all the hard work first (climbing the mountain) and give you an easy route back, hiking into the canyon is the opposite of this. As the signs regularly warn you, “Down is Optional, Up is Mandatory”. Additionally many of these people arrive in the heat of summer.
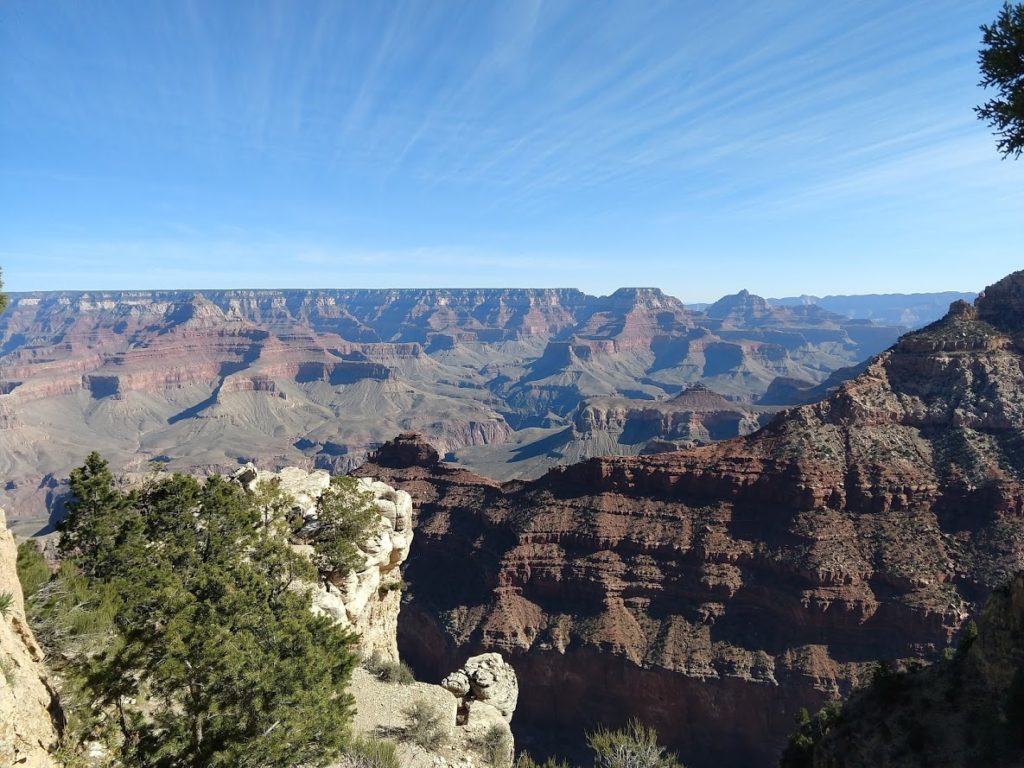
Grand Canyon National Park
This has resulted in the NPS posting very conservative times for completion of hiking routes. We got down to the Indian Garden in pretty good time, but had no idea how long it would take us to get back. Taking the NPS posted times into consideration, as well as the short winter days, we opted to head back up instead of pushing on to the plateau viewpoint.
In hindsight, we could have easily made it to the rim and back without trouble. The hike back up, although gaining considerable elevation, does so at a steady gradient. Meaning it only took us marginally longer to get out, than it did to get in.
Oh well, now we know for next time. We did at least get a chance to stop by the Yavapai Museum of Geology, which offers spectacular views into the canyon, and good displays explaining how the canyon came to form. Well worth the visit.
Grand Canyon National Park
Our next stop was Page, Arizona. If you’re heading north, you should definitely take the time to drive the Desert Trail along the rim of the canyon out East, instead of just sticking to the main roads through Flagstaff. Beyond the additional viewpoints, you also get to stop at the Desert View Watchtower for even more spectacular views of the canyon and the Colorado River.
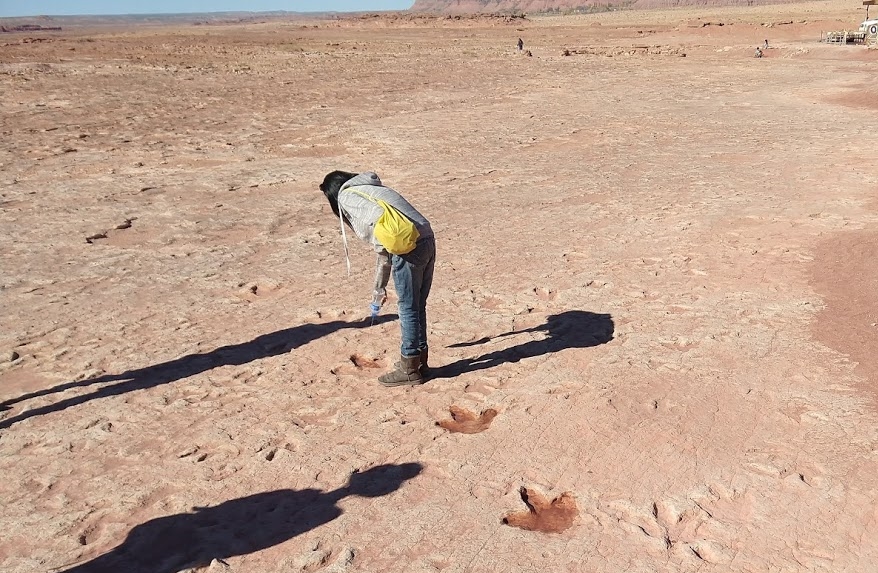
Dinosaur Tracks, Tuba City
When travelling between Page and the Grand Canyon South Rim, you can also stop by Moenkopi Dinosaur Tracks. Sitting on a part of the Navajo Nation, this attraction is self-managed, and not part of a National Park. In my opinion this makes for a non-ideal situation. You’re given an amazing first hand experience of multiple dinosaur artifacts, including very clear dinosaur tracks, with the ability to even touch them. However, there is no thought of conservation. And no information is available, besides what a guide may be able to tell you. Entrance is free, but you will be approached by locals offering to guide you, also free of charge. You should take a tour, and tip your guide at the end. Less than half an hour, but amazing to see. You can read more about it here.
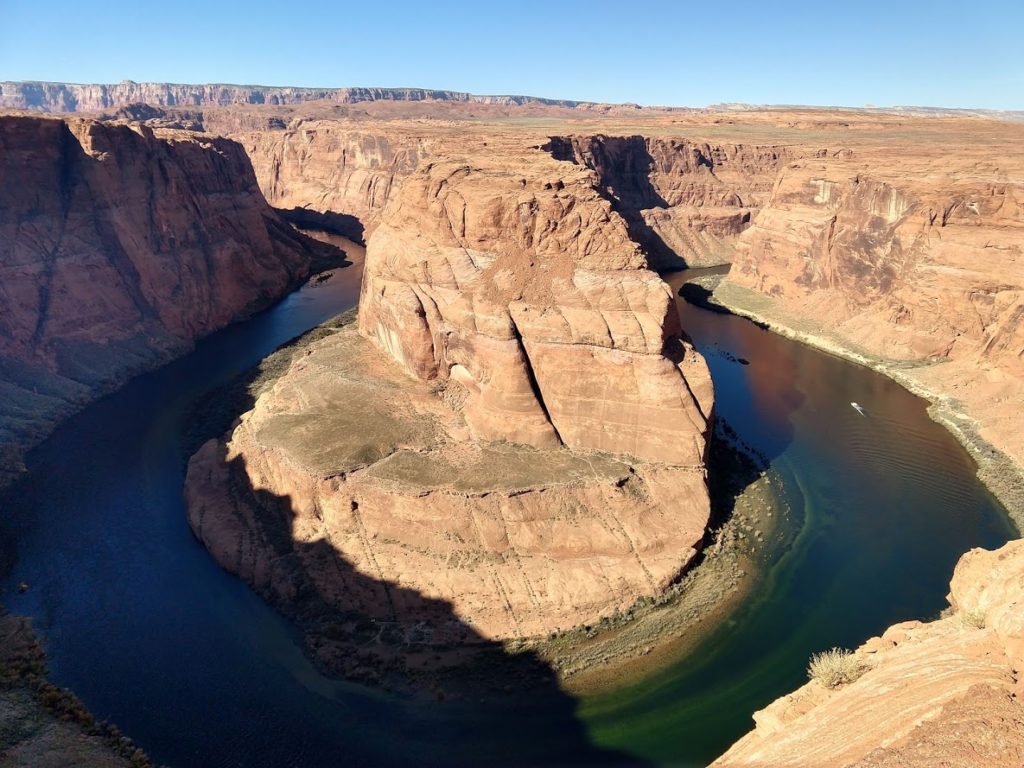
Horseshoe Bend, Glen Canyon National Park
Page is a small town that many people probably don’t know about. It started as a company town to house the people building the Glen Canyon Dam, that contains Lake Powell. Many residents now work for the nearby Navajo Power Station.
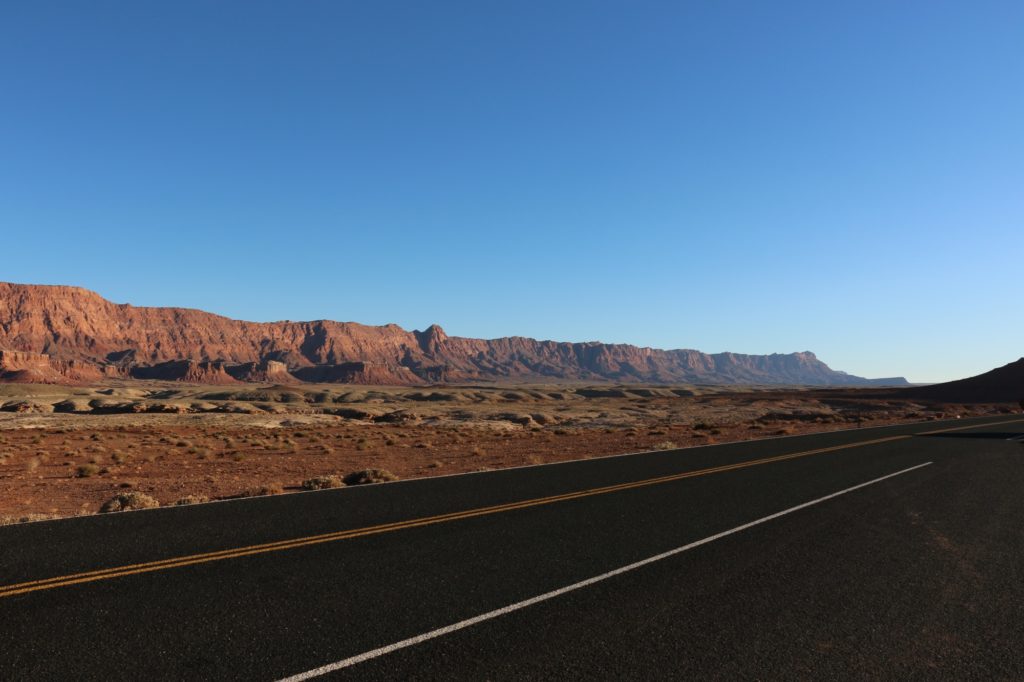
Lees Ferry, Glen Canyon National Park
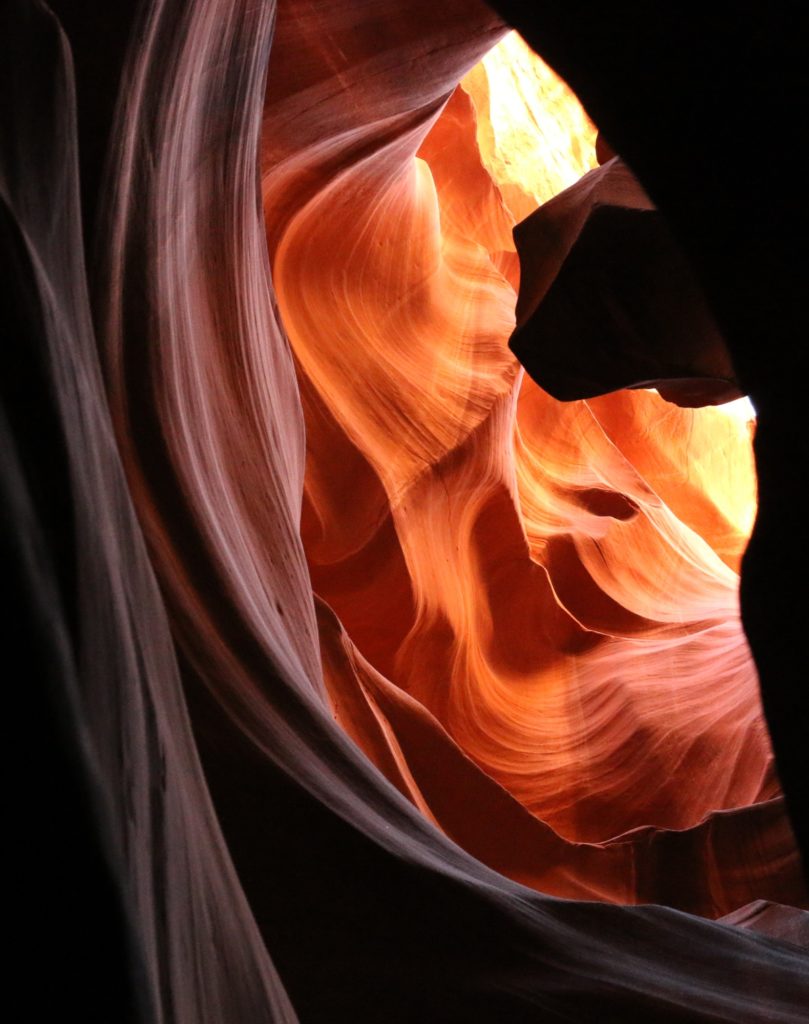
Lake Powell is a popular tourist destination for boating enthusiasts, but Page is also well located as a center point between a multitude of National Parks. As for things to do in Page, it’s most notable tourist attraction must be the distinct Antelope and other slot Canyons. Amazing colours, with intricate lighting provides plenty a photo opportunity. The well-known Horseshoe Bend is also only a few minutes drive out of town. We can also recommend a drive out to Lee’s Ferry. It has several great hikes, and access to the Colorado River.
Antelope Canyon, Navajo Nation
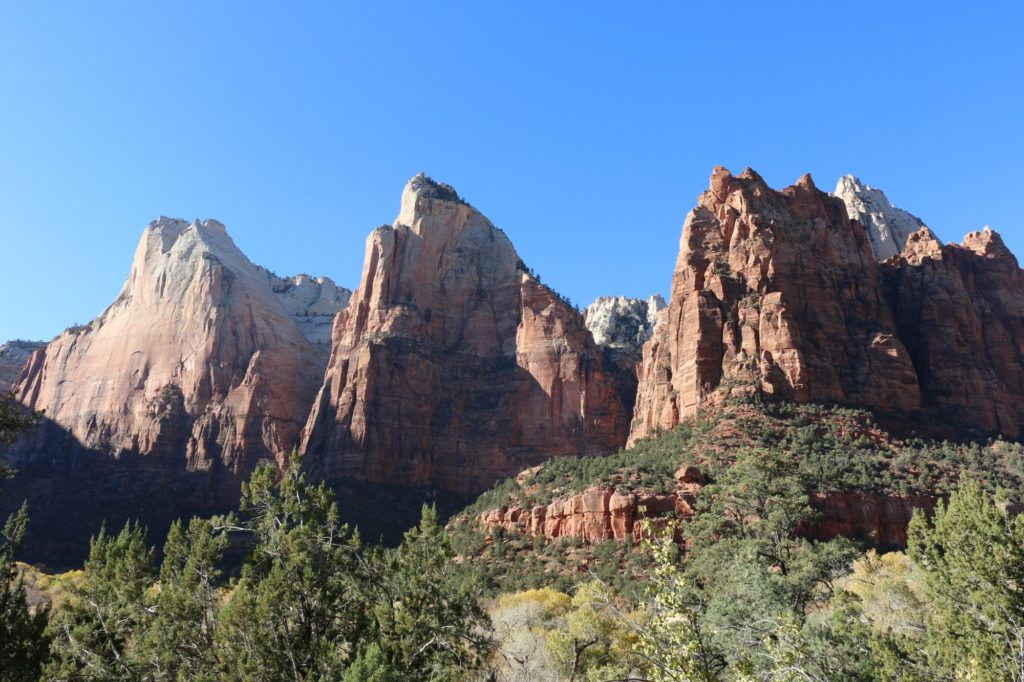
With only a week for our trip, we didn’t have time to see much else, but did make sure to drive through Zion National Park. Another location with stunning vistas, immense mountains and natural beauty. We fortunately were able to take the time to stop in the park for lunch and hop on a shuttle up into the deeper parts of the canyon. As with every stop we made on the trip, it was well worth it. Zion is definitely staying on our list of places to visit, deserving more time to hike and explore.
Court of the Patriarchs, Zion National Park
Our trip was scheduled to end in Ventura, visiting some family. To cut our last day in half we set our sites on Las Vegas. Picking a hotel just off the strip we were able get just some of the Vegas experience, without diving in completely. A walk down the strip, dinner and some fountains were a nice way to wind down.
Bellagio Fountains, Las Vegas
One week is by no means long as far as US roadtrips are concerned, but it gave us enough time see what we wanted to see without rushing. The trip added another 1,700 incident free miles to our car, getting it to cross the 90k mile mark somewhere between Vegas and Barstow.
The rest of the year looks to be fairly quiet beyond some local camping, but next year we hope to limit the international travel and instead focus on seeing more of the US. Zion is already on the cards for April.
I liked cycling. I liked Belgium (from what I knew of it). I figured I’d like cycling through Belgium. And I did. With a friend’s wedding scheduled in the low countries, it seemed like the perfect excuse to do some exploring by bicycle. We say exploring, but due to Schengen Visa requirements, exploring was relegated to the brief time spent each day getting from our planned start to our planned end.
Many people cycle around Europe every day. Some of them even do it for fun. Belgium makes this even easier, regardless of cycling proficiency, by being pretty flat, and having all its towns very close together. This is not necessarily specific to Belgium, but that’s where our friends were getting married, so it was convenient.
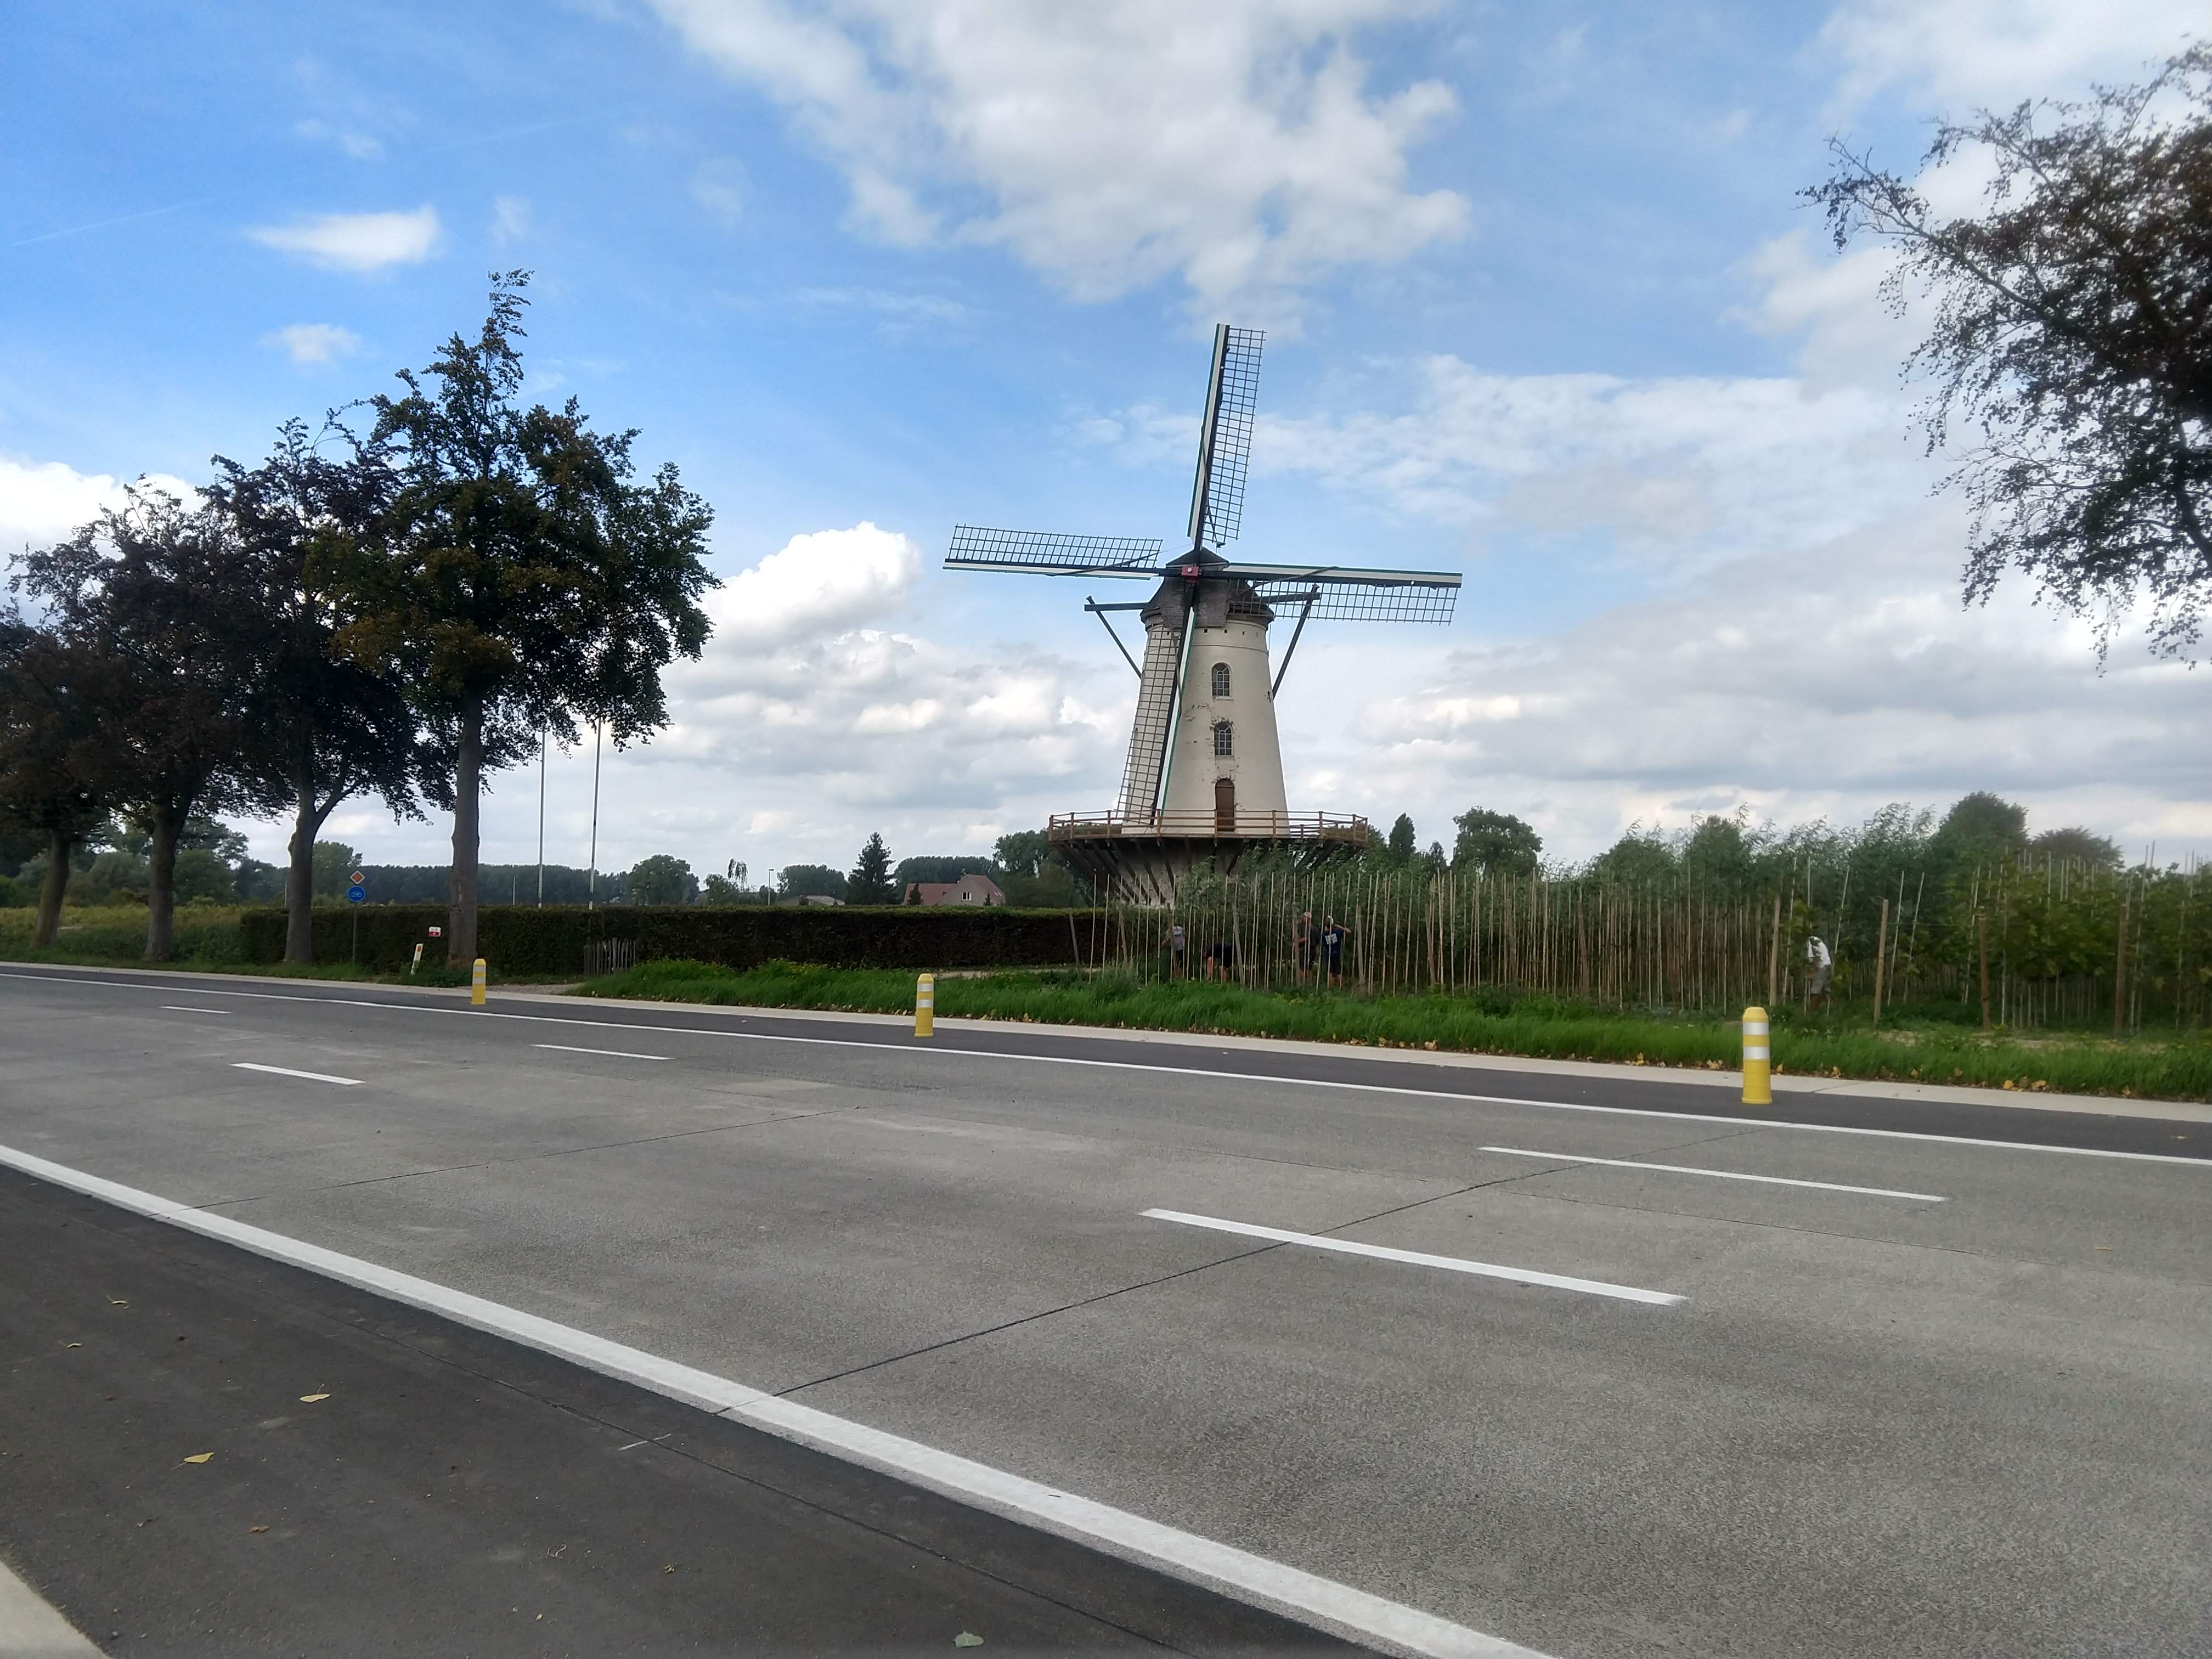
Belgium has windmills too
There are a number of companies which offer various packages for doing cycle tours throughout Europe. Some can be in groups, others can be self-guided. There’s also great variety of choice in the location, distance, support and accommodation packages on offer. And one day I’d love to try some of them, however we were limited.
We didn’t have a lot of time. We wanted to do 3 or 4 days of cycling max. My wife and I also wanted to do this trip by ourselves. We also wanted to start in Brussels and end somewhere else. Ultimately we were too picky. While there are lots of one-way routes on offer, they were generally longer. So we were left to our own devices.
If you’re hiring bicycles, not from a tour group, you’re required to return your bike to the start location. With train systems as they are in Europe this isn’t a major issue, as you can schedule your last day to be a train trip back to where you started, and just chuck your bike on the train. This also allows you to leave baggage at a hotel, in case you have something, like a suit, that you don’t want to cram into your panniers.
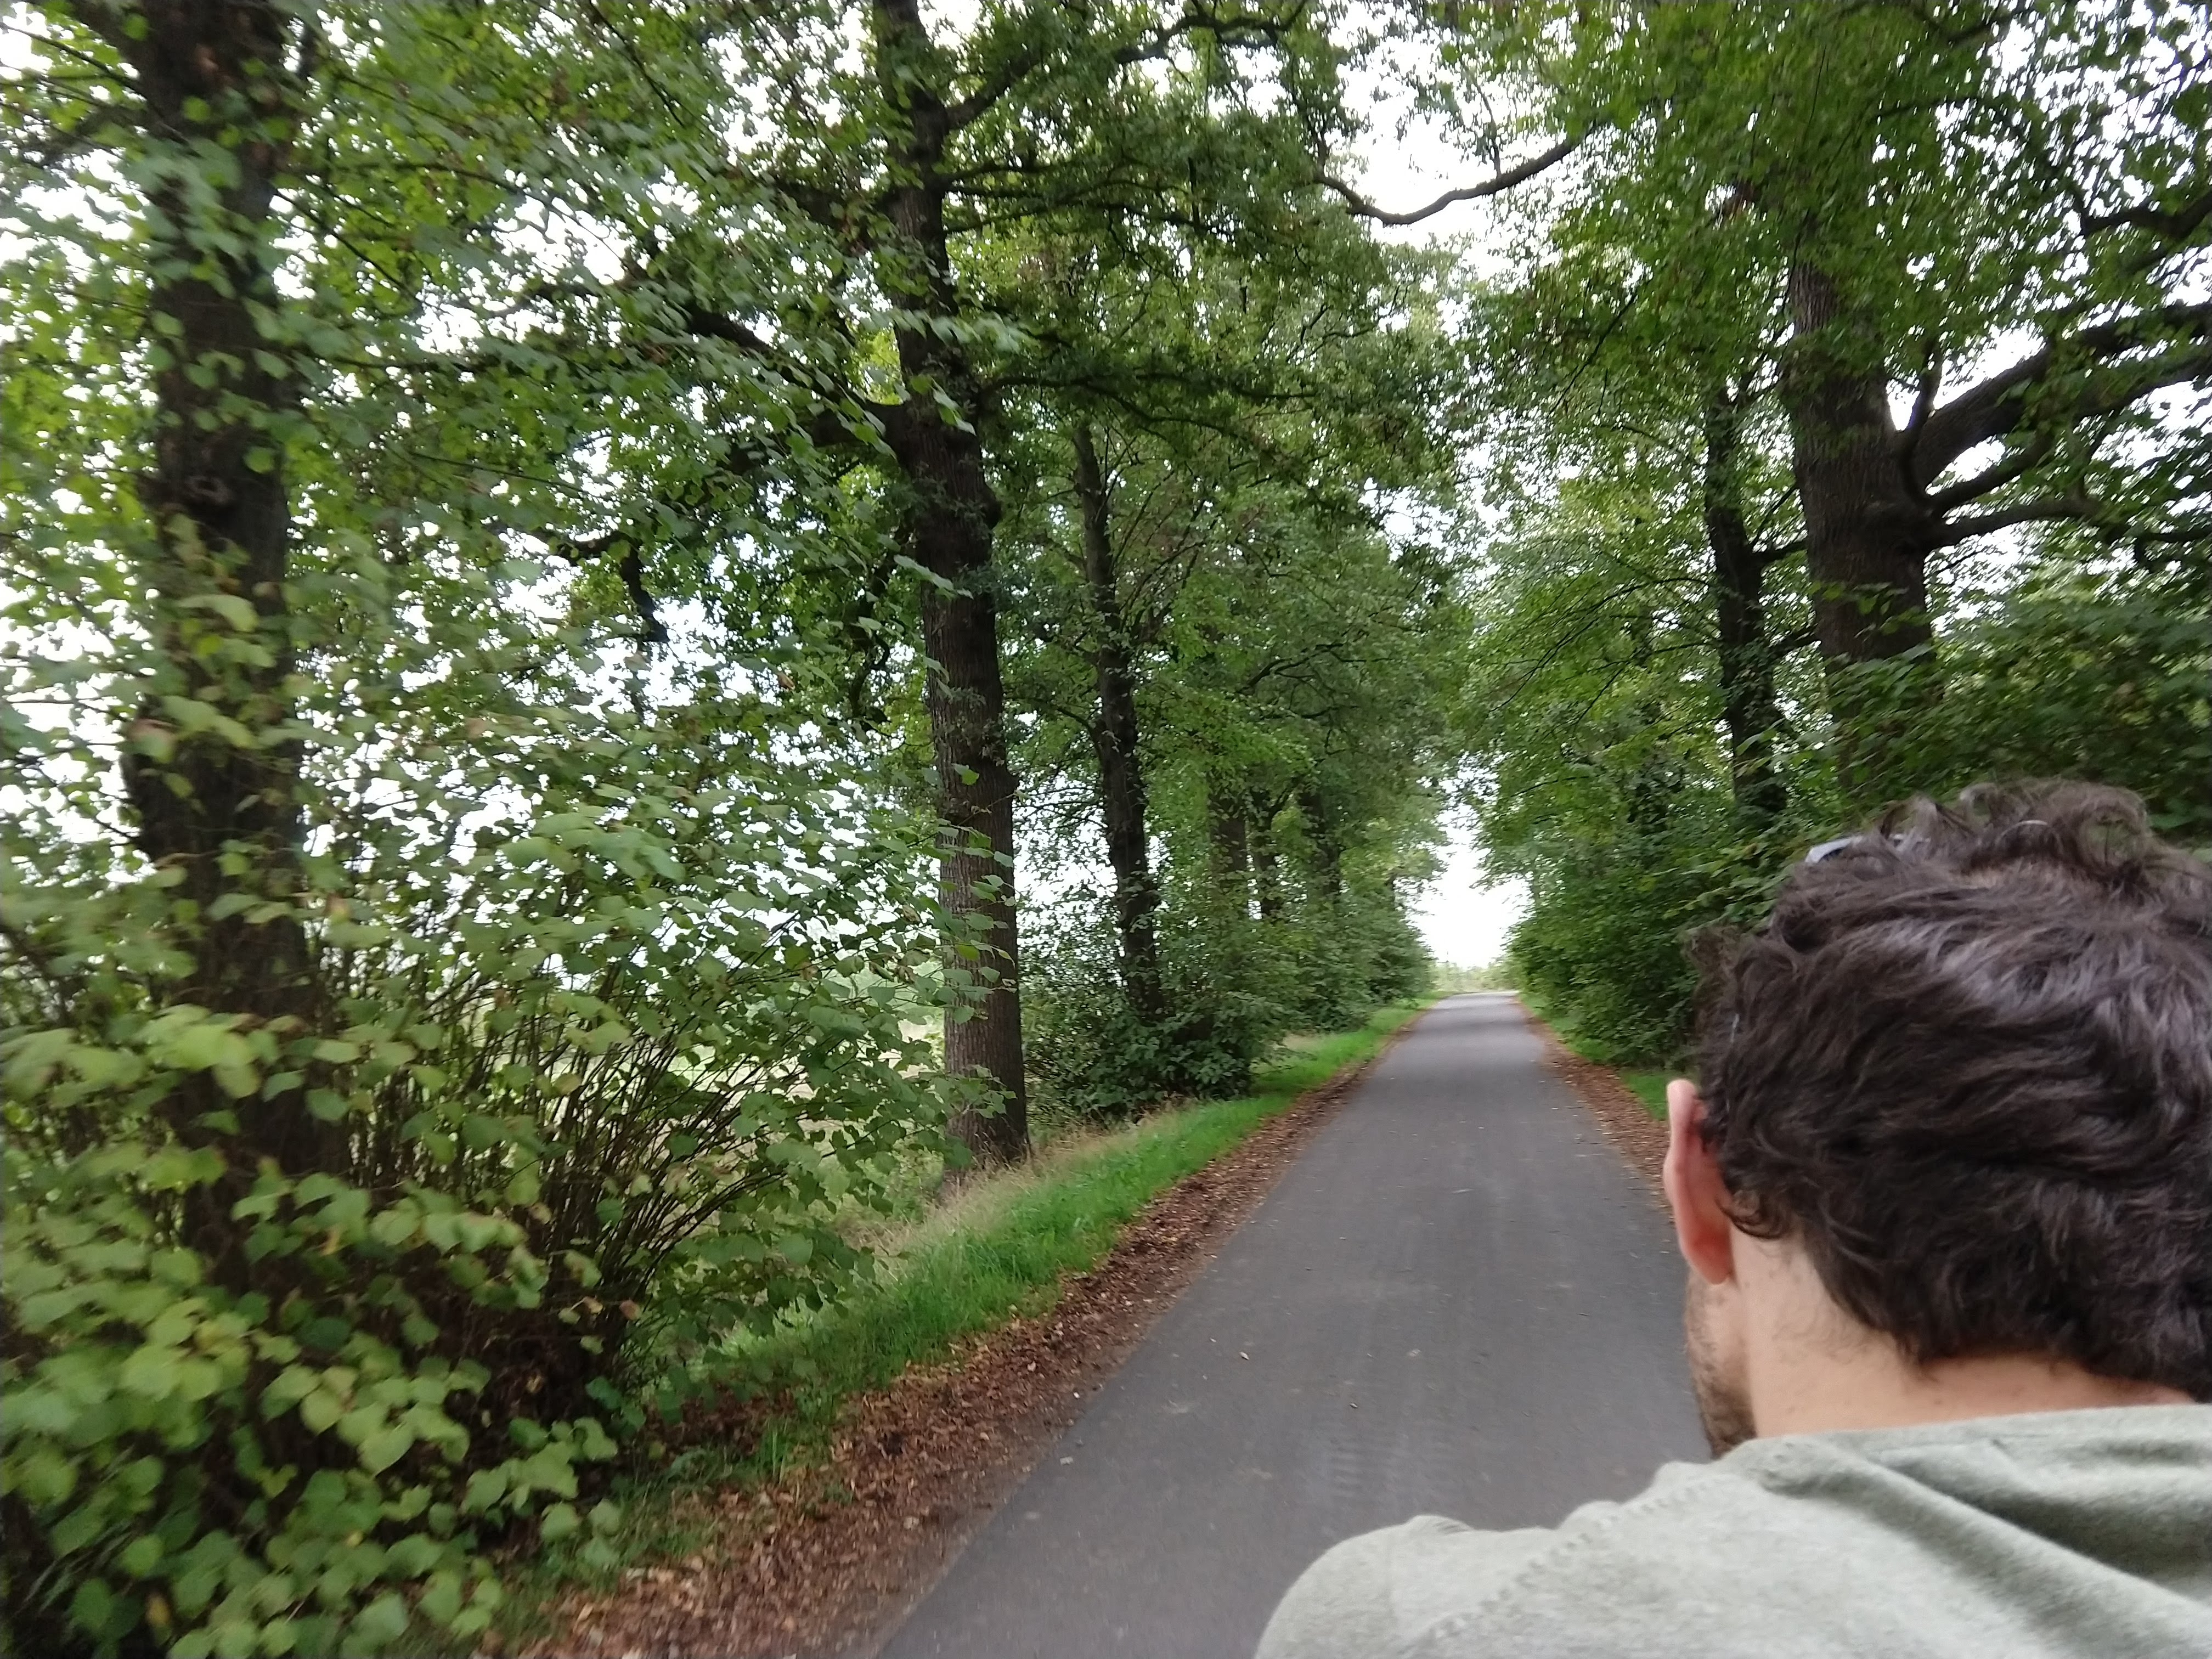
Avenues all to ourselves
Because of our time restriction, and for simplicity’s sake, we eventually decided to do a short 3 day tour. Starting and ending in Brussels, our first day we cycled to Ghent, second day on to Antwerp, and on day three returned to Brussels. We used Cyclo, a Brussels based cycling organisation with several locations, to obtain a bike, and were overall happy with the experience.
The three cities we chose were all roughly 50km apart in a nice triangular formation, which for regular cyclists is not a terribly long distance. In fact it’s a pretty comfortable distance. It’s far enough to convince you’ve done some work and deserve that delicious Belgian beer and waffle, while also getting you to a completely different place in the country, and also not taking the entire day to do it. So what did we do.
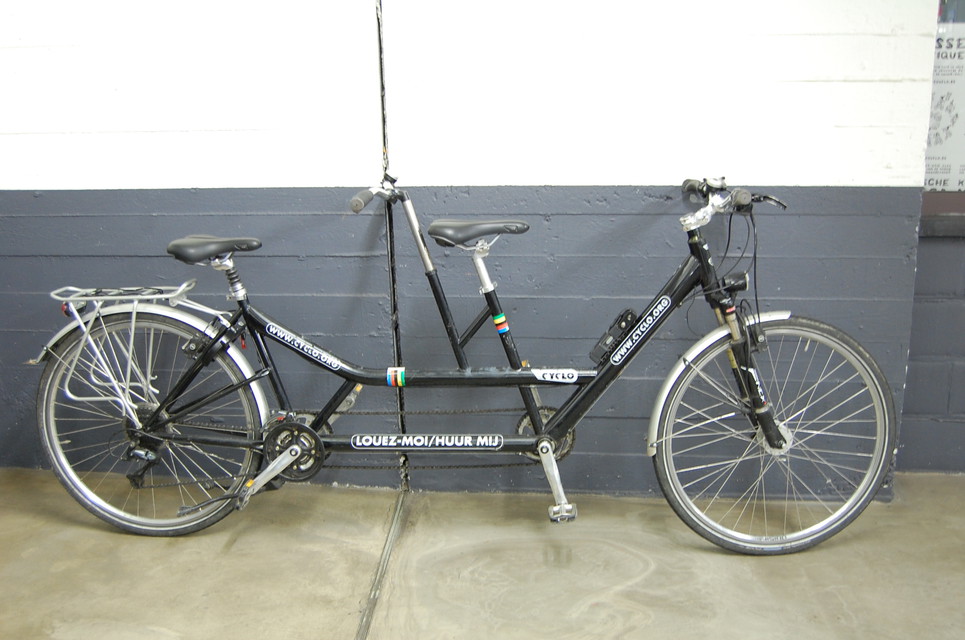
The Bike
You may notice the term ‘the bike’ and not ‘bikes’. This is because we decided to save a bit of money and hire a single tandem, as opposed to two bicycles. I also cycle more than my wife, and figured the trip would be more enjoyable for both of us if we shared a tandem, instead of having individual bicycles.
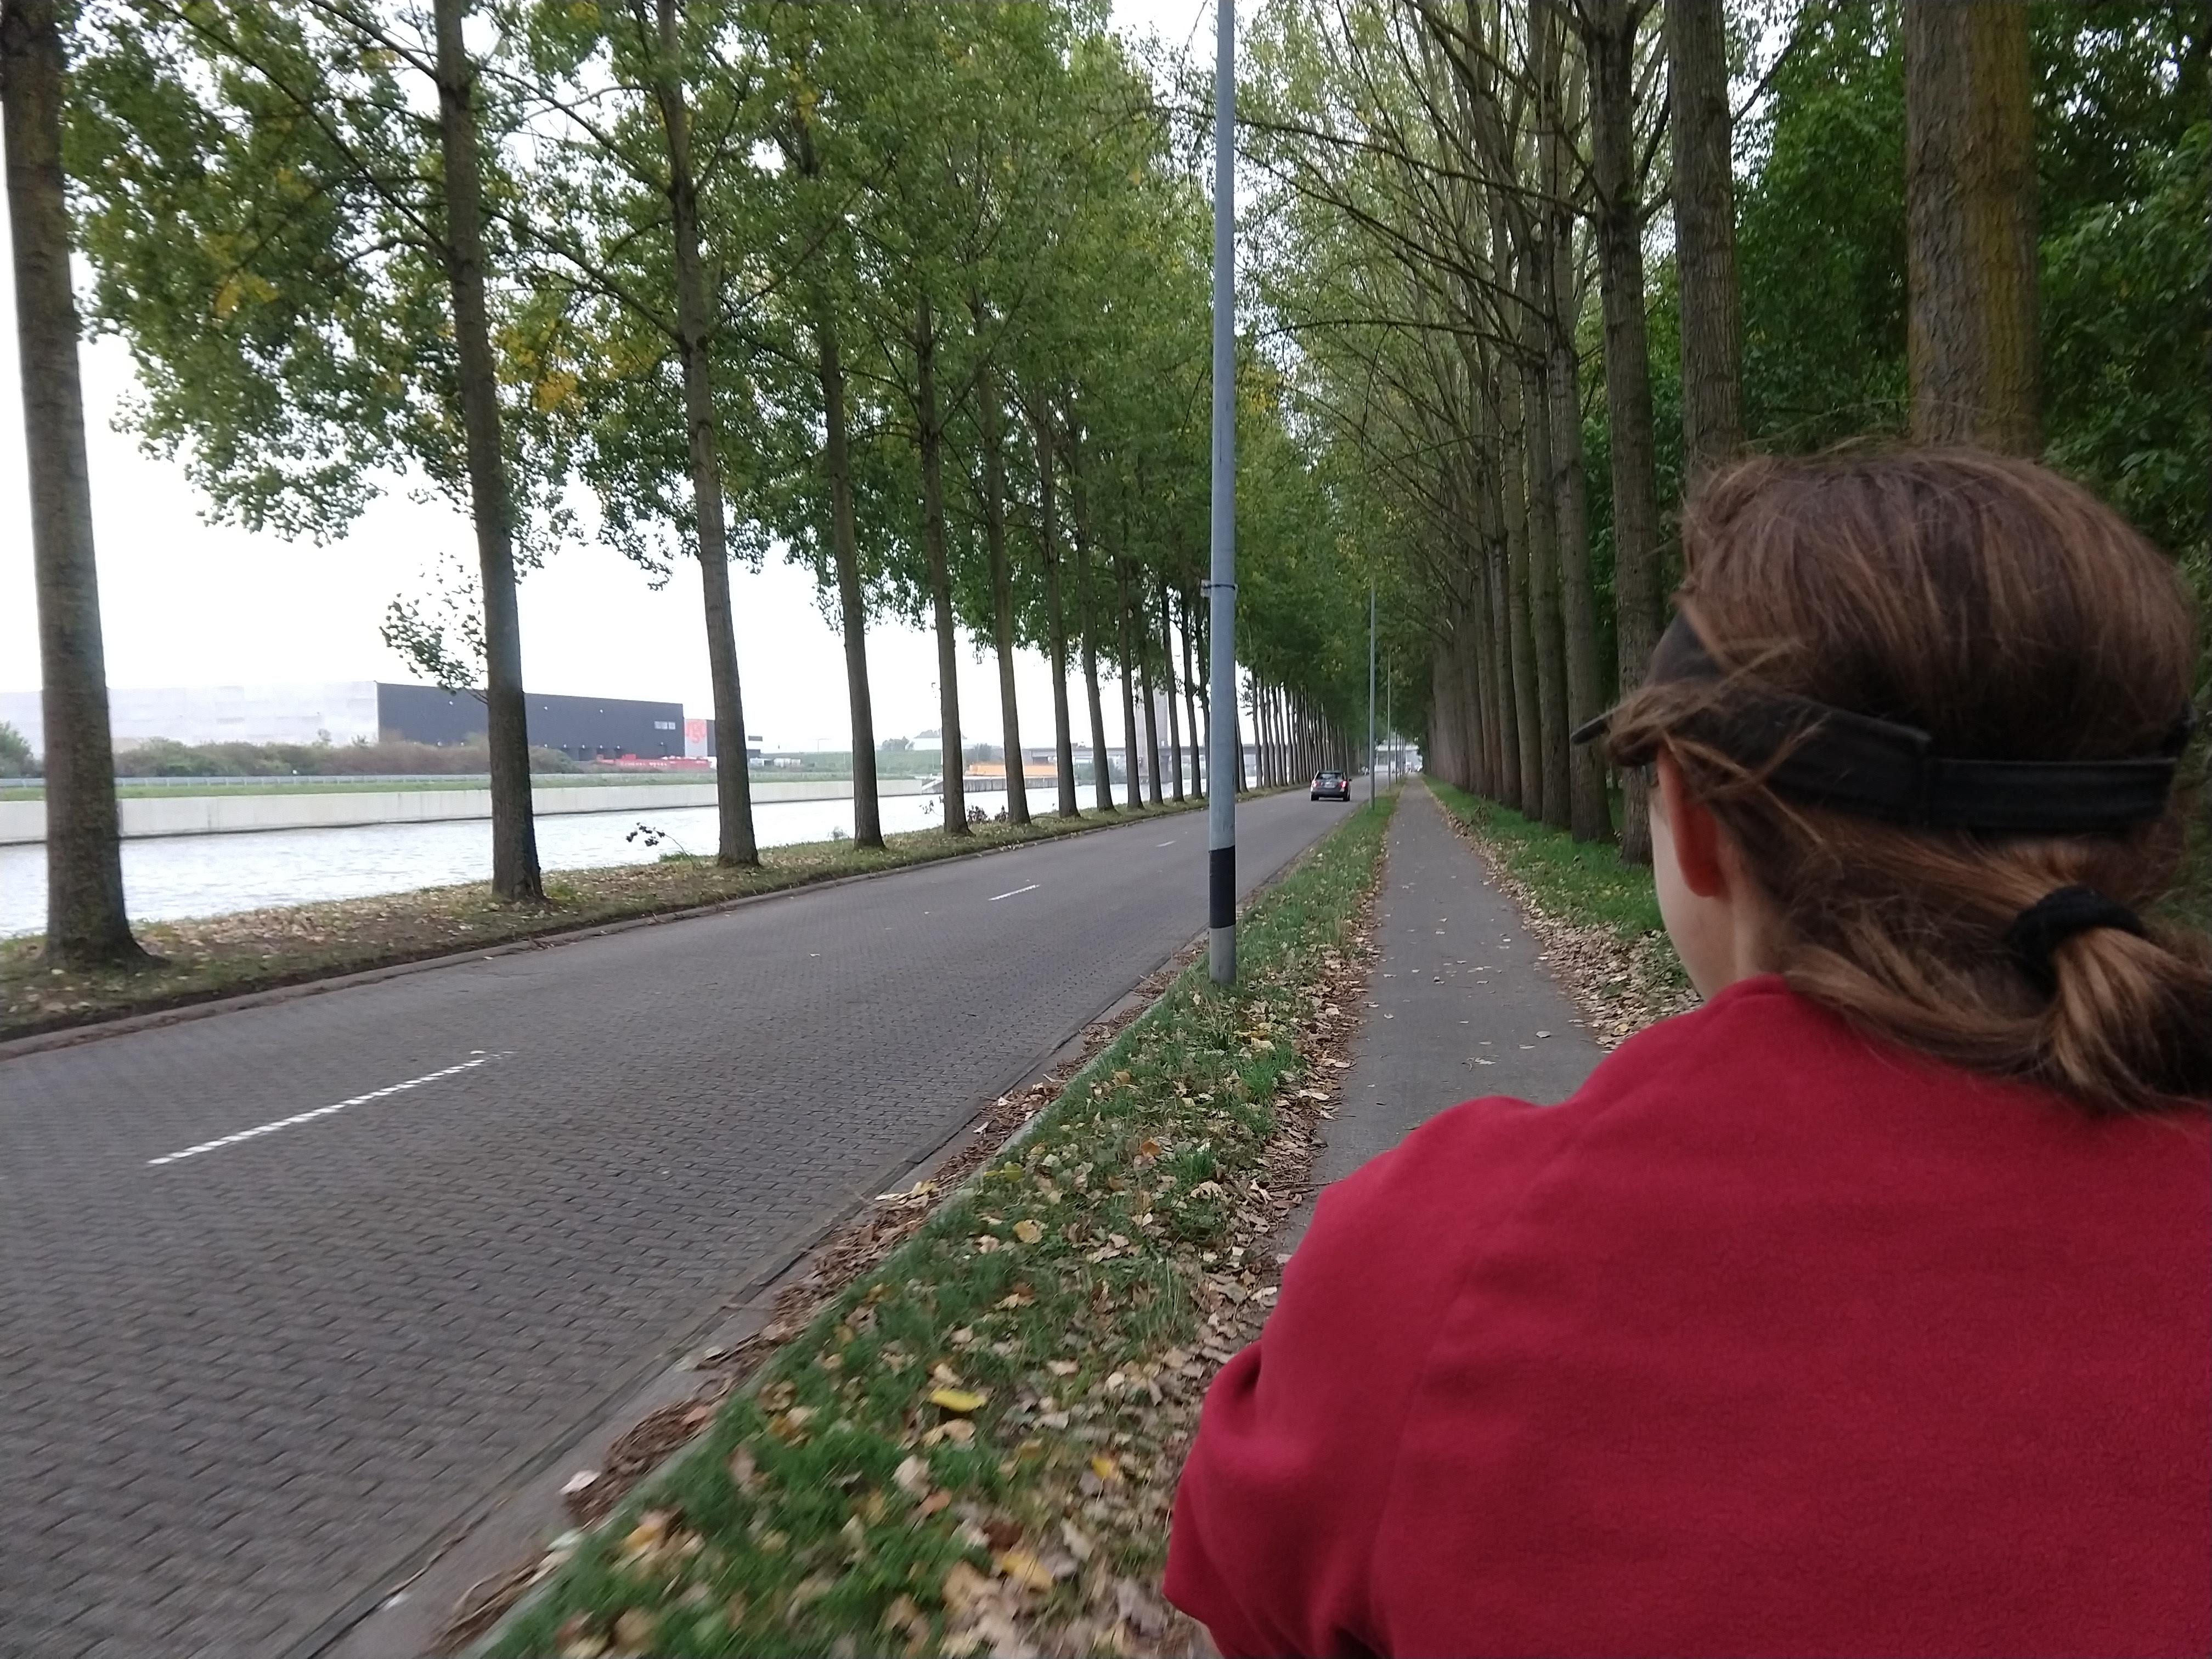
Sometimes we only got a path to ourselves, and not a whole road
This was not the wrong decision. But we’re not sure if we’d do it again. Cyclo were able to provide us a perfectly decent tandem (it even had front suspension). There were one or two niggly things on the bike which we only picked up once we were far away from Brussels. It didn’t stop us, and the problems weren’t tandem specific, but it slightly affected our experience.
Firstly, I am not short, and rental bikes are not made for not short people, particularly one-size-fits-all tandems. The gears on our bike weren’t properly tuned, and the rear seat kept sliding down, no matter how we tried to tighten it. It also had a kick stand which loosened, and due to the length of the tandem would often scrape things while riding. The routes we ended up riding also involved more ‘rustic’ paths than we had anticipated, for which a tandem is not ideal. Also cobblestones. However this is perhaps again, no a tandem specific issue.
Our bike looked something like this
The tandem was fun though. It was fun to be together the whole time. It was fun to ride at the back at times. It was fun to have someone taking photos and navigating while the person in front could continue focusing on the cycling. We didn’t get upset with each other, or have any specific bad experience on the tandem, but at the end we both agreed we’d rather have been on our own bikes.
But wow, as flat as Belgium is, it’s a different ballgame climbing a hill with another person, panniers, bike locks and a (allegedly) 23kg bike.
Route Planning
Because this is Belgium, you can get away with Google Maps, and for getting out of cities, this is definitely what I’d recommend. Our first day we left later than we would have liked, and had to get to Ghent by a specific time, as such we decided to just follow Google Maps. And it works. But Google Maps takes you on the straightest easiest route. Also the least interesting, and least pretty route. We finished the first day and were a bit disappointed. We were hoping for some nice Belgian countryside, but we mostly just rode next to a B-road for 50km.
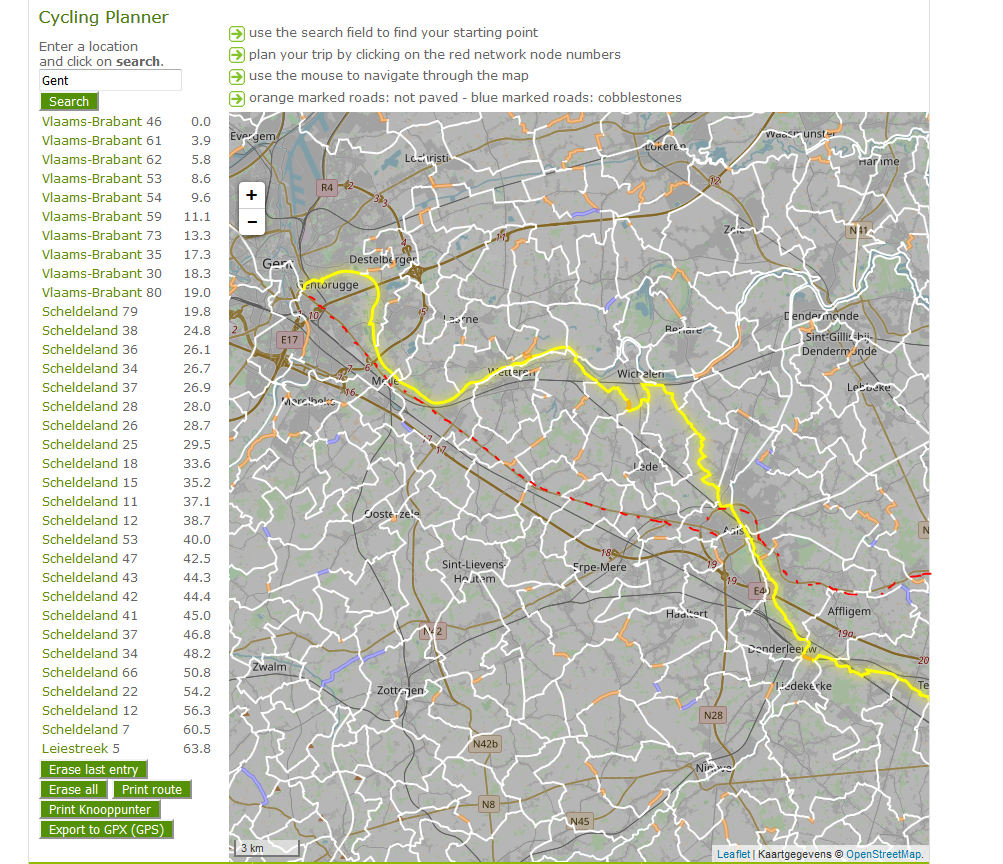
Thankfully there’s fietsroute.org. They are an amazing resource for all things cycling in Belgium (fiets is Dutch is for bicycle). Along with general information and suggested themed routes, they also just have a route planner letting you select a start and finish point, while it generates the best route.
The Belgian cycling routes are set out in nodes (an intersection where multiple routes meet). At each node there are signs pointing in the direction of the next node. And along each stretch, there are additional signs keeping you on track to the node you want. Fietsroute generates a route for you based on these nodes. It explicitly does not make use of main roads, as you can see in the below image, where the bicycle routes are overlaid on the normal street map.
Fietsroute generated route in yellow. Google Maps route shown in dashed-red.
Inevitably these routes end up being 20%+ further than the direct Google Maps option. But it’s well worth it. The routes it generates are far more enjoyable. Taking you through the countryside. On old farm roads, cobbled streets, and generally less trafficked and prettier areas. If you’re on a road bike, you may want to do a bit more work to ensure you stick to paved roads, as the first route you get may take you on some less than desirable paths (although these sections can be short).
Fietsroute provides a list of all the nodes (knooppunten) that you need to follow to get to your destination, and you can technically just follow road signs to these destinations. We found however it safer to download the GPX output and track those on a GPS. Most GPSs support this functionality, and there are several cellphone apps as well. We ended up using BikeGPX, which was sufficient for our purposes, if not perfect.
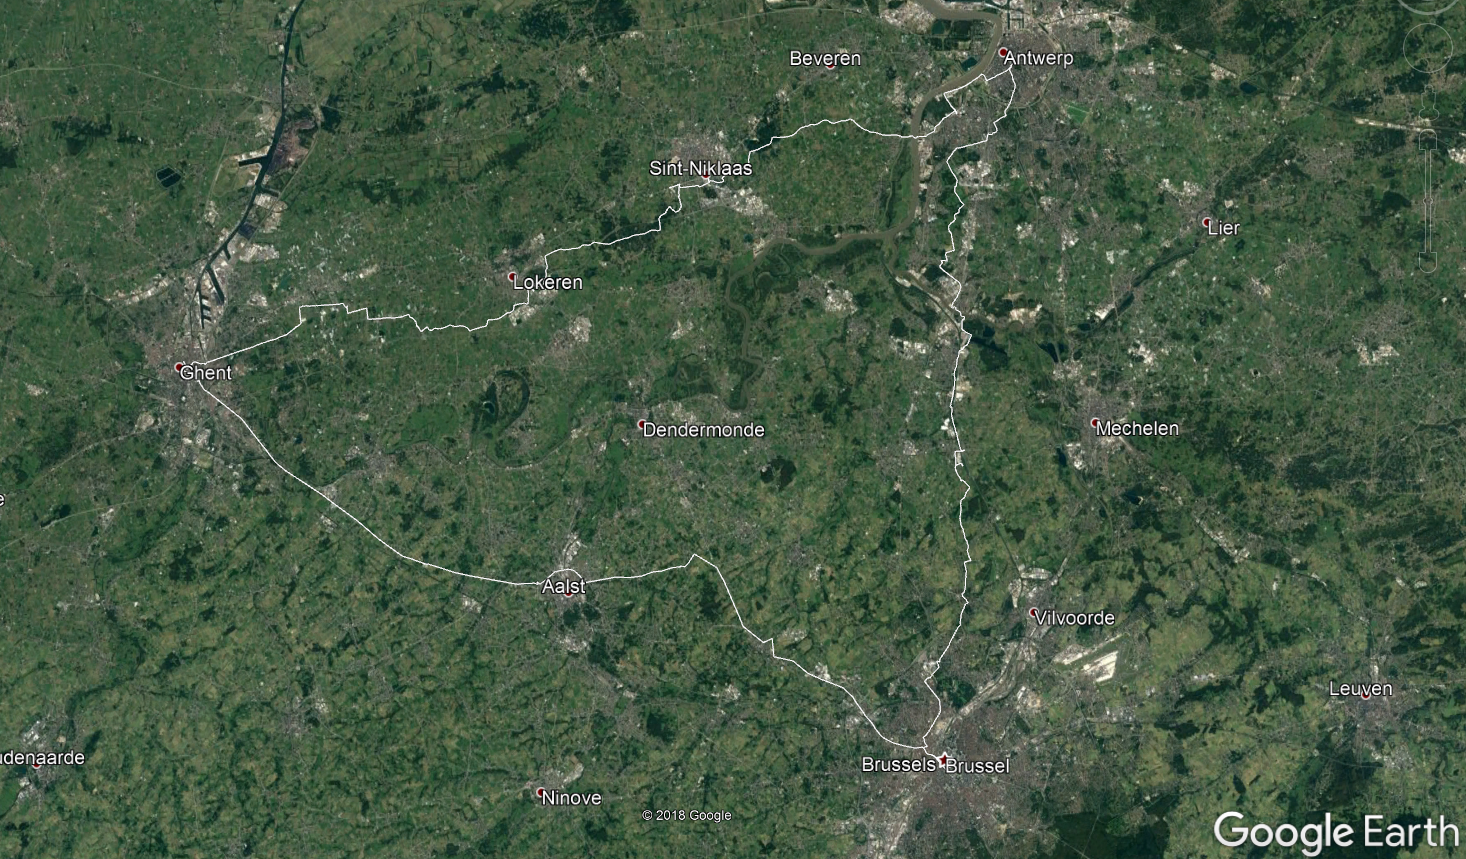
Below is the route we ended up taking. You can see on day one the route is fairly smooth as we followed Google Maps, and day two and three are more jagged, as we traced the Fietsroute suggested path.
Our route in white, leading us from Brussels to Ghent to Antwerp
Accommodation
You have many choices when it comes to accommodation. There are hotels everywhere. There’s AirBnB and multiple similar services. We ended up selecting places off Fietsroute’s list of BnBs.
Regardless of where you stay you’ll be able to lock your bike up outside for a night relatively safely. However the more expensive your bike, the greater chance of theft. The list of places on Fietsroute are listed specifically to cater for cyclists. So the places we stayed in Ghent and Antwerp both had place for us to store our bike overnight. Even our double length tandem. They also end up being a bit cheaper than regular accomodation.
But accommodation is really a small concern. Places in Belgium are so close together that you’ll be able to find somewhere to stay, no matter how far you decide to cycle each day.
Cycling through the countryside
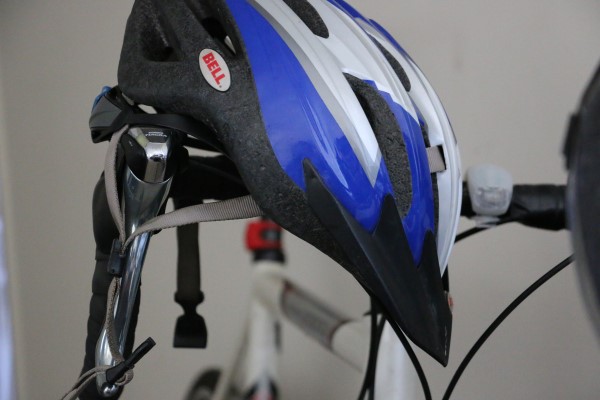
Helmets
I grew up wearing a helmet while cycling, and continue to do so. We planned on picking up helmets along with our rental bike. However, when collecting our bike, there were no helmets. Not to rent, not even to purchase. The shop cited some off-hand liability reasons.
And so we joined the throngs of helmetless Belgians, cycling through the cities, cycling on country paths. Sharing roads with cars, enjoying other roads completely devoid of any traffic. And being very careful not to crash.
In and around Brussels, probably only a quarter of people we saw cycling had helmets on. And cycling between the cities reduced even that. Arriving in Amsterdam (which easily had four times as many cyclists) revealed only 1 in 100 people wearing a helmet. Although the risk of an incident with a car is far less than say Los Angeles, or South Africa, I would have still expected helmets to be worn for for events not involving automobiles.
But we survived, without incident. The flat nature of the country, and heavy load kept our maximum speed at any point to under 20kmph. Which certainly worked in our favour.
Additionally, it was just wonderful to cycle around Belgium. Vehicle traffic is clearly aware of cyclists, and you never have to worry about being cutoff, or impatient drivers trying to squeeze past. This was true in the cities themselves, which had bike lanes laid out all over, as well as along more remote roads. People may be in a hurry, but they respect a cyclist’s place on the road
Final Thoughts
Cycling is fun and a great way to see a country. Especially if you choose to take the backroads. So many pretty tree-lined avenues, where it’s just you cycling along. So many unexpected ferry crossings.
We knew going in that we wouldn’t have much time to explore each city. Considering we were planning on traveling for 5 hours a day, this only left a few hours each evening to explore, and considering we only had one night in Ghent and Antwerp, we didn’t see much. We cycled and walked the towns, but rarely went in to places like museums. That being said, they both have a lot to see just from the perspective of a cyclist or pedestrian.
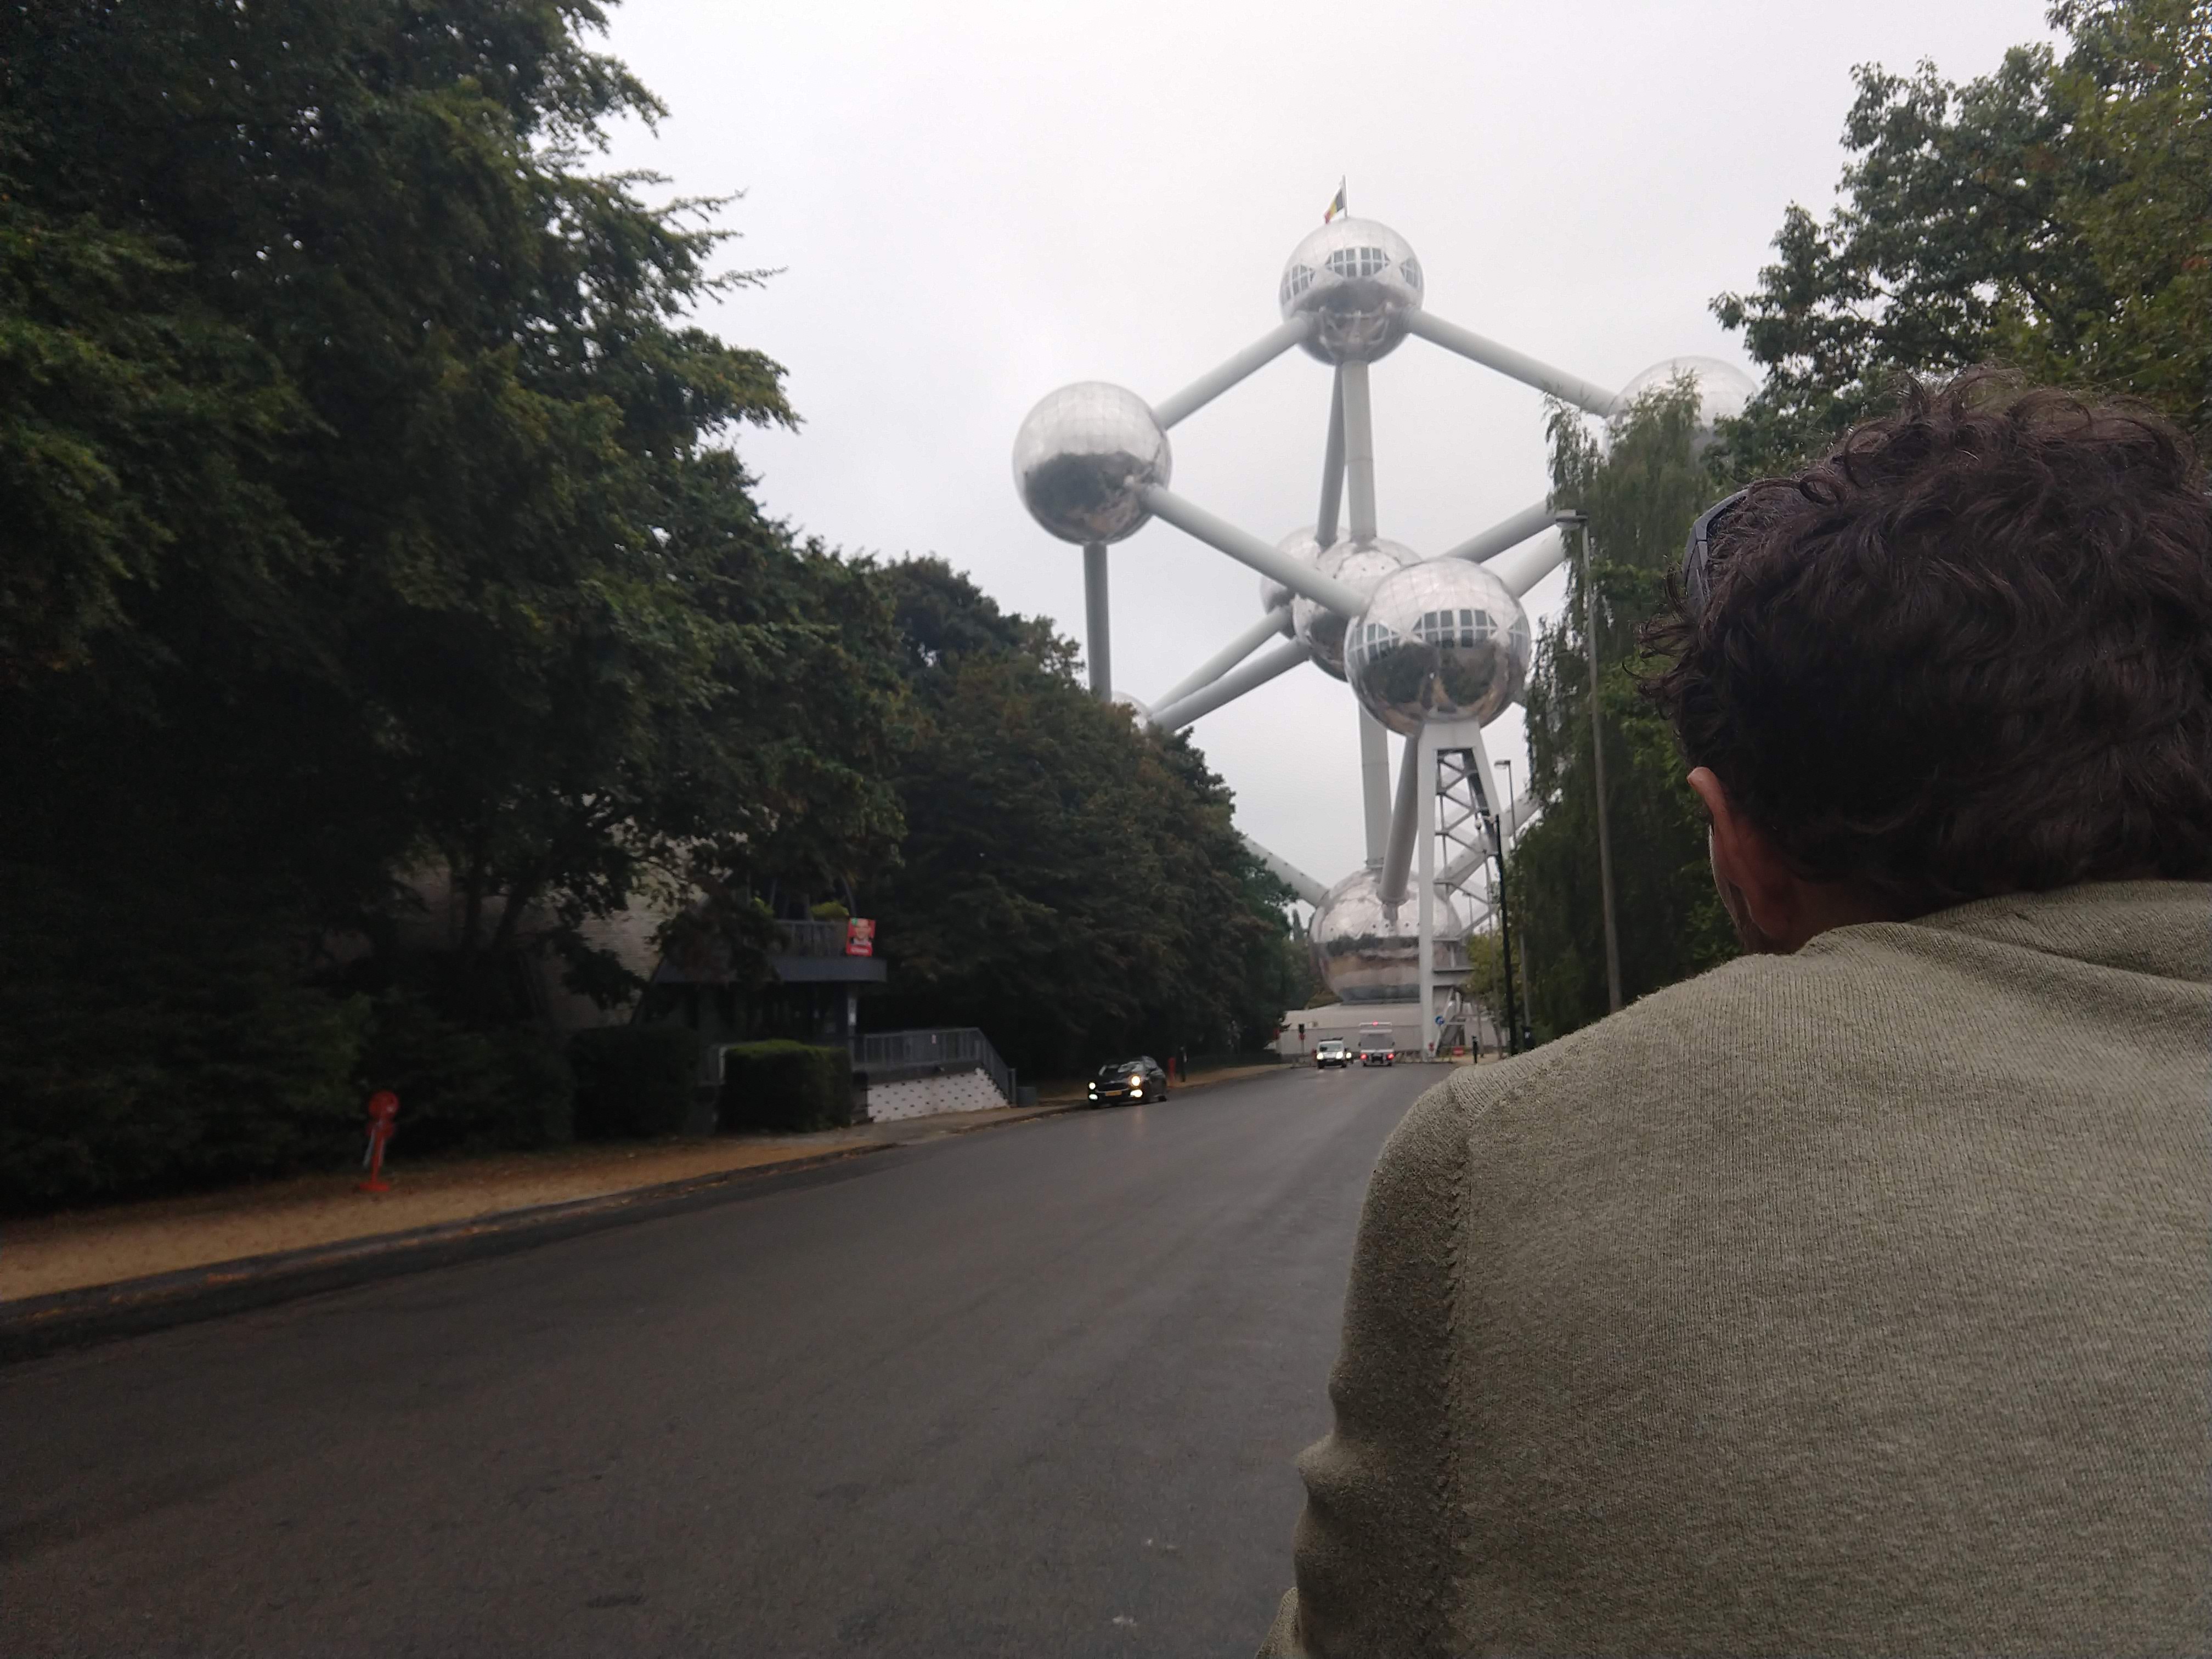
We made sure to cycle past the Atomium on the way back. It’s like the Eiffel Tower of Brussels
50-60km is not a lot to do each day. But considering how close cities are, it would be nice to plan shorter trips each day. This would also allow you to leave later and arrive earlier in each place, giving you more time to explore. Alternatively staying an extra night in each location.
Getting away from rental bikes is difficult, but we’d at least try switch to single bikes, allowing for a more comfortable riding experience. We’d also pack helmets.
In closing, we’d totally do this again. Everything worked out great, and for our first such trip I’m not unhappy with any of our decisions..