
This is probably the easiest modification you can imagine, although it took a bit of time to figure out. When we imported our car from the US to Canada, we had to get Daytime Running Lights installed, as the US spec vehicles did not have this standard.
The DRL requirement is pretty broad, but basically, whenever the car is moving, your vehicle is required to have ‘some’ front facing lights on. The standard modification is to purchase a kit like this, which is just a relay you put in parallel with your existing headlight (or parking light) relay, and then wire up to turn on with your ignition.
Not particularly complicated, but it’s extra stuff you have to mount in the car, and connect etc. Surely there is a better way? Even in the US, we already drove the car with the headlights on the whole time. The car automatically turned them off when you stopped the car. But the DRL requirement means that even if the light switch is in the OFF position, the lights must still come on when driving. Lucky for me I had gotten hold of the service manual for our car, and was able to dig through the limited wiring diagrams provided.

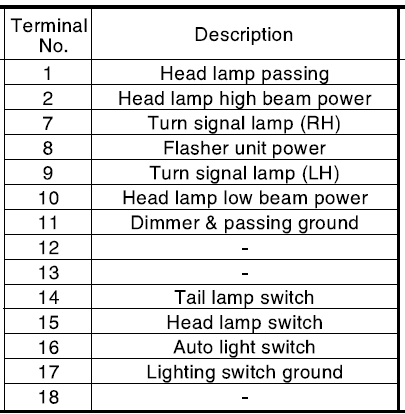
From the above diagrams we can see that when the switch is in the ON (ll) position, the system connects “Lighting switch ground” to “Tail lamp switch”, “Head lamp switch” and “Auto light switch”. And when the switch is in the Parking Lights (l) position, it connects “Lighting switch ground” to “Tail lamp switch” only. When it’s OFF, no connections are made.
I couldn’t find the full circuit diagram for the lighting switch, but the circuit diagram for the Auto Lighting circuit (which our car doesn’t have) seemed like a good starting point.

If we just ignore all the connections to the Auto light unit, we probably get a good idea of the circuit. The key take away is that battery power is only provided to the headlamp relay when the ignition is on. So in theory, if we just short “Lighting switch ground” to “Head lamp switch”, the lights will come on and off with “IGN2”.
Another thing to keep in mind, is that this modification would then not result in your tail lamps being illuminated. This is fine from a legal perspective, but means that at night, you must ensure your light switch is in the ON position.
I considered just connecting the “Tail lamp switch” to “Lighting switch ground” at all times as well, but it leads to complications if you want to use your parking lights. On the Hyundai Tucson, the parking lights come on and off with the tail lamps. Additionally, default behaviour is that when you turn the car off, no matter what position your light switch is in, all lights turn off when the car is locked. Including parking lights. If you want the parking lights to stay on, you have to leave the driver’s side door open, turn the lights from ON/Parking to OFF, and then back to ON/Parking. Then when you close and lock they’ll stay on. Were I to permanently connecting the “Tail lamp switch” to “Lighting switch ground”, there would be no way to get the circuit into an OFF state, so that I could then activate the parking lights after I locked the car. It’s not that I’ve ever used my parking lights for their intended function, but I still have to pass an Ontario Safety inspection, and it’s not clear to me whether they check actual functionality, or just that I have working lights in the parking lights.
Instructions:
- Remove steering column footwell cover (2 screws)
- Remove steering wheel upper cover (clips into lower cover)
- Remove steering wheel lower cover (3 screws under steering wheel column)
- Unplug Lighting Switch connector on left hand side.
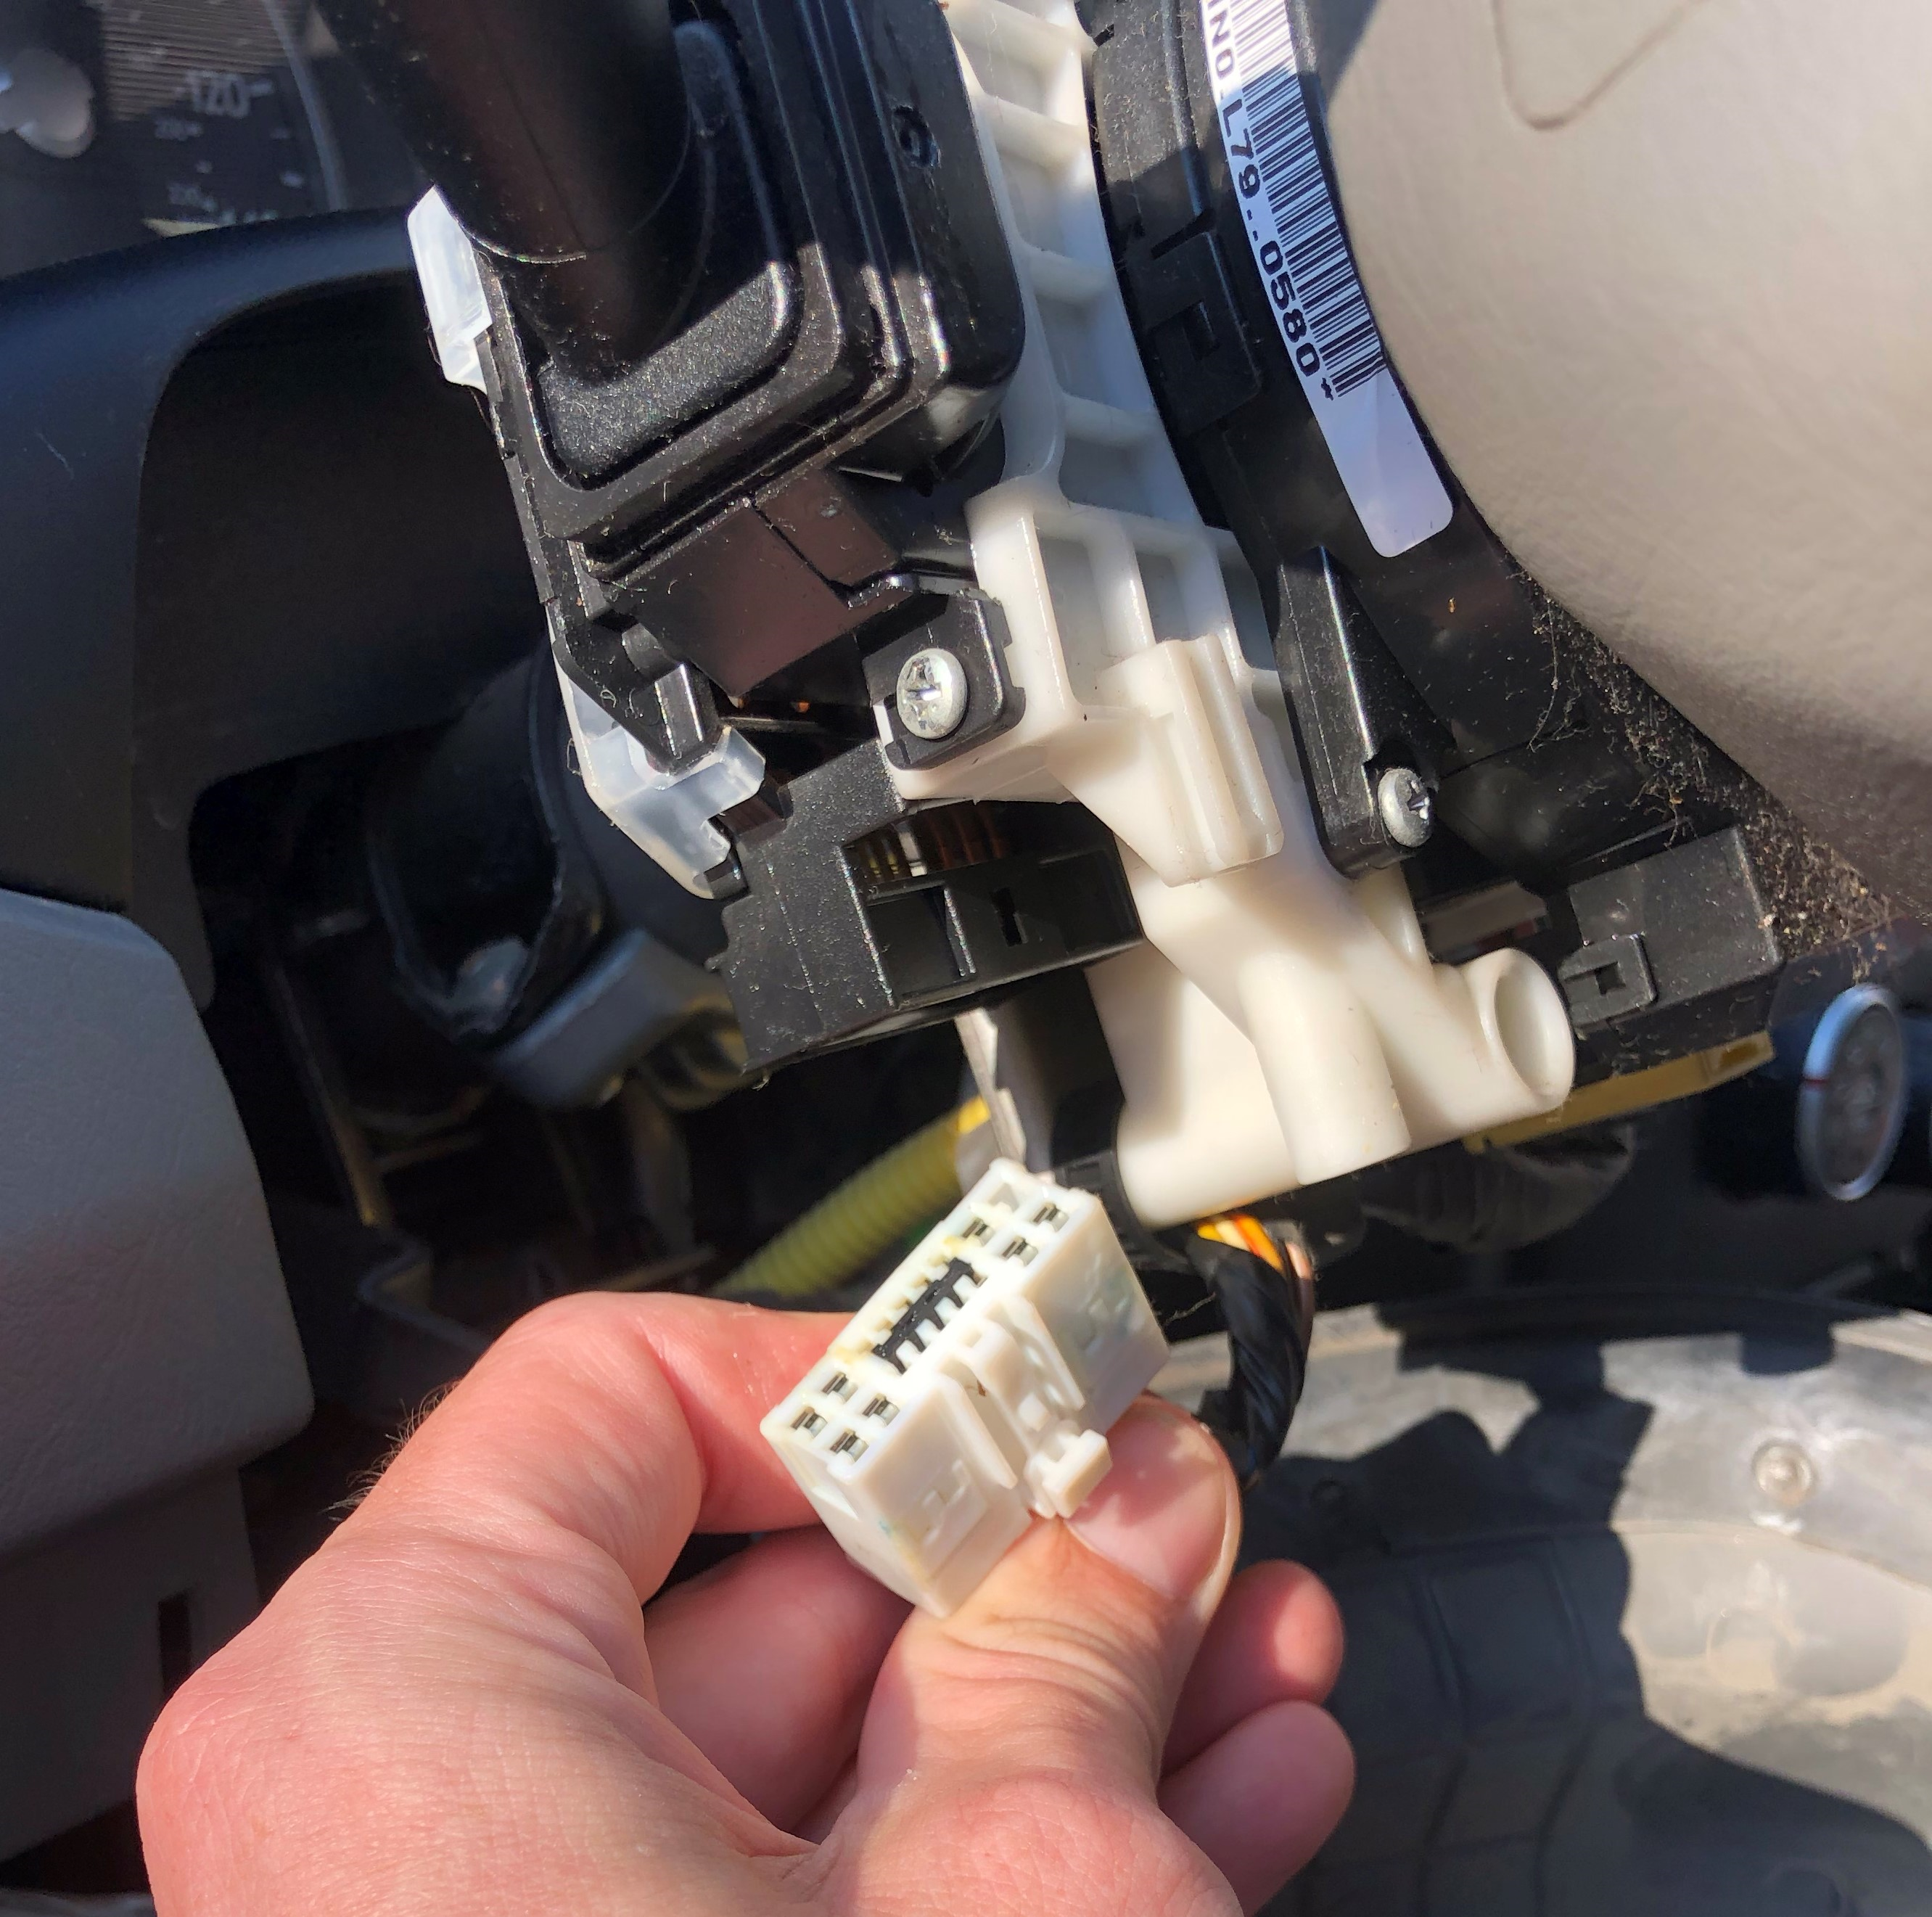
- Identify “Head Lamp Switch (15)” and “Lighting switch ground (17)” wires in connector.

- To confirm you have correctly identified the wires:
- Use a multimeter to confirm that pin 17 is shorted to vehicle ground.
- Switch the Light switch to the OFF position and confirm no short between 14, 15, 16 and 17
- Switch the Light switch to position l and confirm short between 14 and 17, but not between 15, 16 and 17
- Switch the Light switch to position ll and confirm short between 14, 15, 16 and 17
- Using whatever your preferred method is, make a permanent connection between pins 17 and 15. I took some of the insulation off the wires behind the connector and soldered a jumper cable in-between.
- Other non-solder alternatives are available: referral link
- Reconnect Lighting Switch connector.
- Test lighting works as expected:
- With ignition on, Headlamps are on in all lighting switch positions (OFF, l and ll)
- With ignition on, Tail lamps and Parking lights are on in Positions l and ll