The rear brake pads on our 2008 Hyundau Tucson were wearing thin; I’d also noted some vibration after extended braking coming from the front wheels. As such I decided to replace the rear brake pads, as well as the front discs and pads.
I had replaced the pads on my old Audi previously, and while it wasn’t difficult, it was still a hassle. In contrast, replacing the Tucson’s pads is something almost anyone can do, all you need is a size 14 socket.
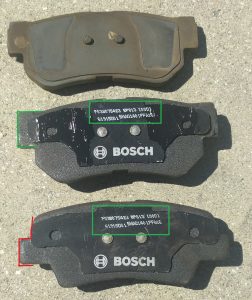
There are a bunch of manufacturers who all make products to fit your car. I went with Bosch, because they were the only brand I recognised, but there are many other good manufacturers. In fact I was quite disappointed by Bosch, who packaged incorrect parts into one of the boxes I ordered. Amazon were quick to send me a replacement set.
For the 2008 Hyundai Tucson, I purchased the following parts:
- Rear Brake Discs – QuietCast Premium BP813
- Front Brake Discs – QuietCast Premium BC924
- Front Brake Rotors x2 – QuietCast Premium
Disclaimer
Properly functioning brake pads are a critical safety component of your car. While the process for replacing these parts is relatively straightforward, you shouldn’t perform the task if you’re not comfortable doing it. If anything doesn’t fit right, or looks unusual, rather get it checked out by a professional. Additionally, after installing new components, your brakes take some time to wear in, and won’t function 100% immediately. For more info on properly wearing in your brakes, look here.
Rear Wheel Brake Pad Replacement
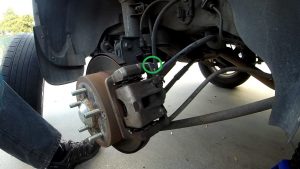
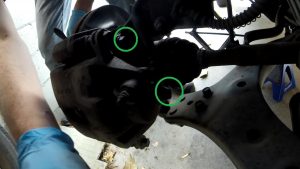
Get the car up onto jackstands and remove the rear wheel. The brake system is fairly prominent. The entire mechanism is attached to the back of the wheel with two size 14 bolts that are tensioned with a spring washer. You don’t need to remove these. There are another two size 14 bolts (caliper bolts) that are more accessible and easier to remove that hold the mechanism together.
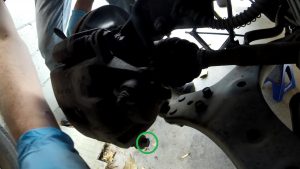
Loosen just the top bolt, and the mechanism folds open. You can then remove the old pads and runners if you have replacements. Now is the best time to push the piston back in. I opened the brake fluid reservoir and emptied some fluid from it before pushing the piston back. This way you don’t have to worry about it overflowing. I put the old brake pad on top of the piston, and used a C-clamp to push it back in.
Now you can load the new clips and pads. Depending on what you purchase, you may want to switch shims over from your old pads to the new new ones. Installation is easy, and you can also apply some lubricant to surfaces that you want to slide easy (not the brake surfaces!). Slide everything back together and tighten bolt.
Front Wheel Brake Pad Replacement
The front brake pad replacement is basically identical. The only difference is that instead of loosening the top caliper bolt, you’re going to loosen the bottom one and open the mechanism upwards.
Otherwise the process is the same.
Front Wheel Brake Disc/Rotor Replacement
The brake rotors only have two bolts holding them in place, but the entire brake mechanism has to be removed as well. For the front wheels you’re going to need a size 17 socket/spanner. For the rear wheels it’s a 14. Loosen both of the bolts, and have something nearby that you can rest the brake mechanism on.
Then you need to loosen the two screws holding the rotor in place. You need a rather large Philips screwdriver. These screws can be quite tight, I used a bit of WD40 to loosen them up, but if you’re going to be reusing the discs/screws, make sure to clean them properly, you want them to be tight.
My old discs came off very easily. Some people have more trouble, especially on older cars, you can try something like this if you’re stuck. The new discs go on in reverse order.


What kind of lubricant were you using and what was the total time that the replacement took?
If you’re just replacing the pads, most of the time is spent lifting the car and removing the wheels. If you’re doing all four wheels, and have a hydraulic jack, you can probably get all four pads replaced in an hour. You can add an extra half hour if you haven’t done it before, just to find where everything is located.
The lubricant I used was a grease that was supplied with the brake pads. You should be able to find it at your local car parts shop, something like this: Permatex Ultra Disc Brake Caliper Lube
Cheers Gareth, never done this before, not much of a mechanic, but managed to all 4 corners, just pads in less than an hour after studying your vids……
Glad it was helpful!
Awesome first rate tutorial!