We purchased a second hand car a few years ago. When we got it, it came with one key, and no keyless entry remote. Some 2008 Hyundai Tucson’s came with a keyless entry remote, but there was no way for me to determine if our car had the necessary hardware. If it did, I could simply purchase a new key and get it re-programmed. However queries with Hyundai only resulted in new-car sales pitches, and I wasn’t going to risk wasting $100 to buy a key and get it re-programmed with no guarantee.
Instead, I installed a garage-remote receiver in my car. The car has central-locking which is triggered by using the key in the door. Using a remote controlled relay, one can send the same signal to the central locking system as the key switch does. I used an old receiver I had lying around, similar to this. There are many different remote control kits available that can be used here. The important things to check are that they will operate off 12 VDC and how much current the receiver uses when idle.
The ETACS (Electronic Time and Alarm Control System) in the Hyundai Tucson draws up to 4mA black current. That is, when the car is off. Ideally you want a receiver with a similar, or lower current draw. My receiver draws about 10mA. Not ideal, but I did the math and determined that as long as we drove the car once every two weeks, we shouldn’t come anywhere near to flattening the battery (less than 2 Ah per week).
The switches in the door keylocks simply short the signal line to ground to trigger locking/unlocking. I chose to use the passenger/assistant door key switch. If you use the driver door key switch, you may have to push the unlock button twice to get it to open, as when unlocking with the key, once has to twist the key twice.
All the connections you need are by the ETACS, and the ETACS also has space around it (in my manual transmission in any case) to mount the receiver.
The ETACS is located below the gear lever. To access it, one has to remove several sections of fascia. You can see how to do that looking at the photos in the below gallery:
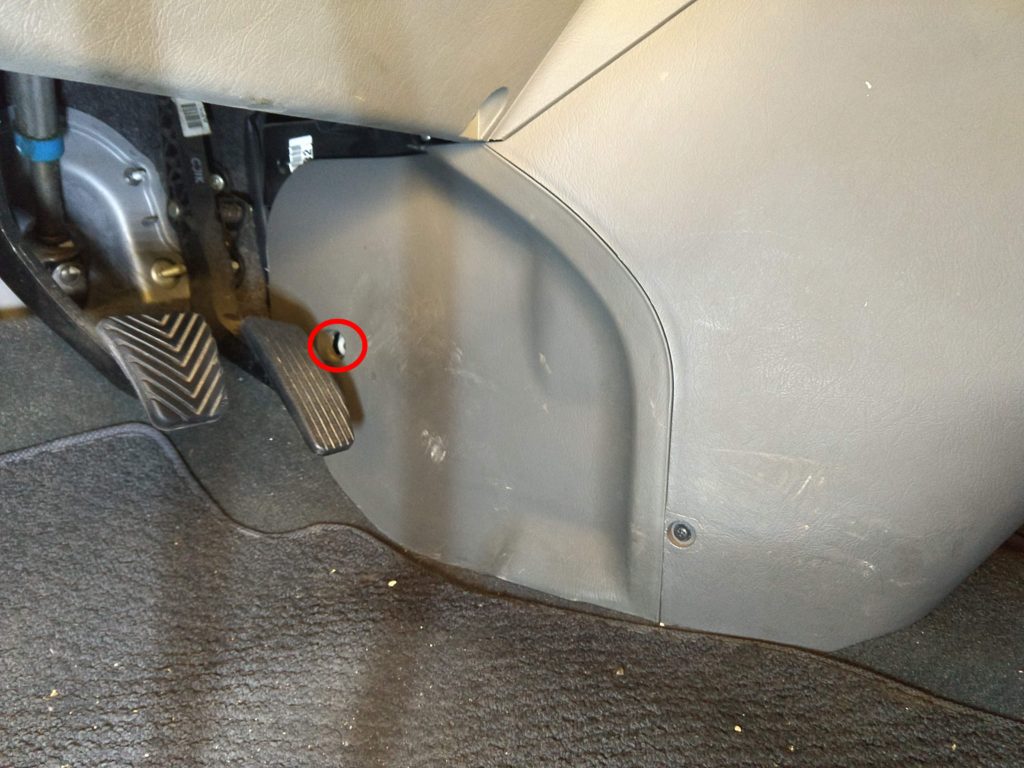
Undo screw on driver’s side. 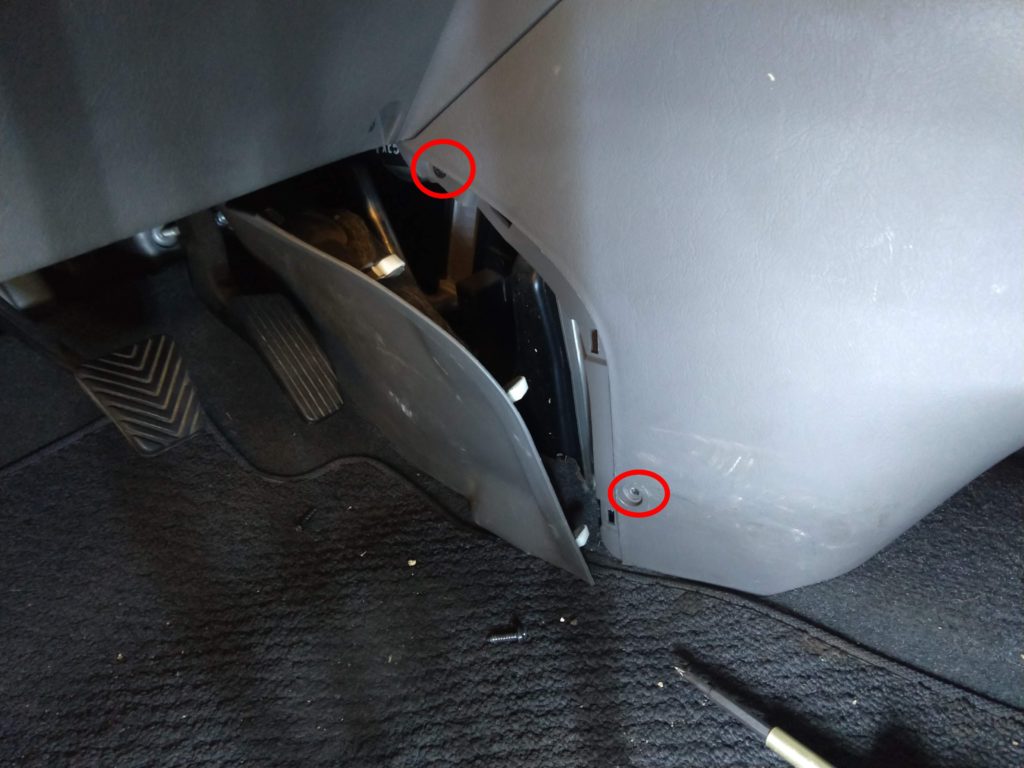
Pull front fascia away, unclipping three clips. Then loosen two screws. 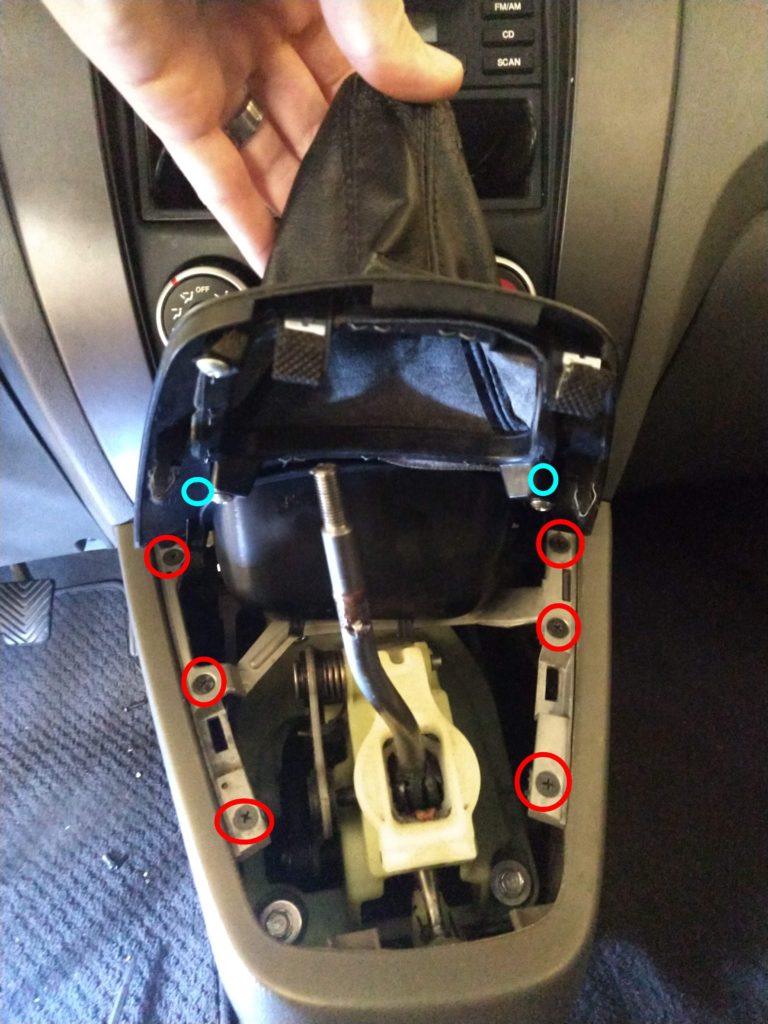
Unscrew gear lever head. Pull cover off. Loosen 8 screws (blue screws hidden in this photo) 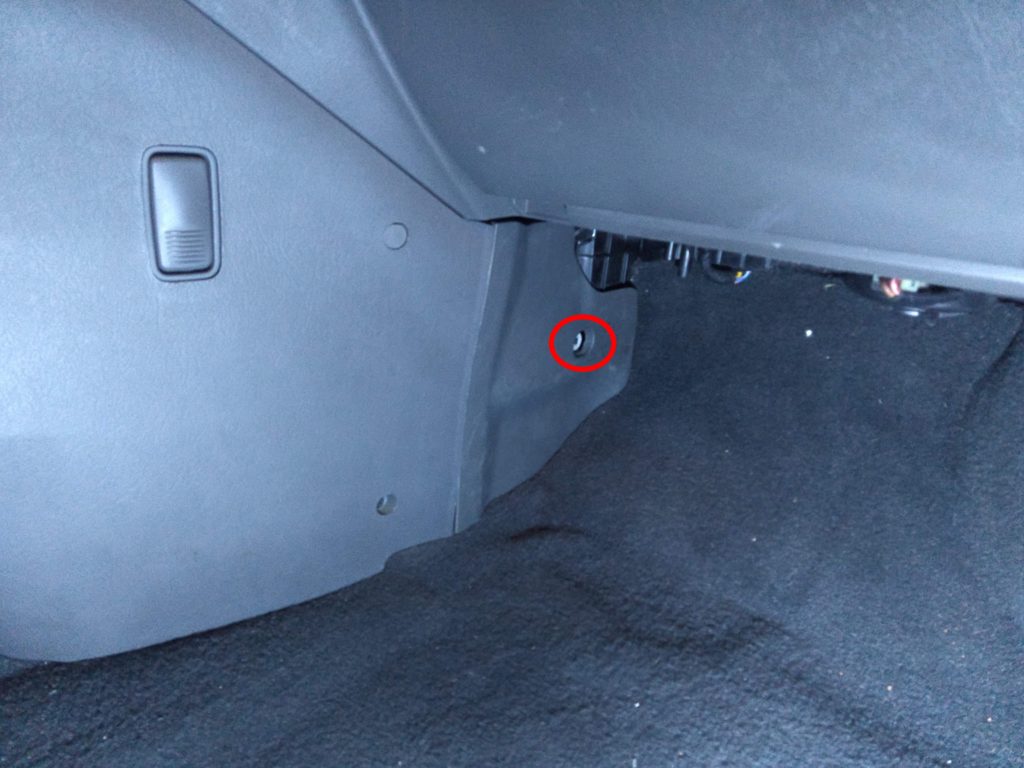
Undo screw on passenger’s side. 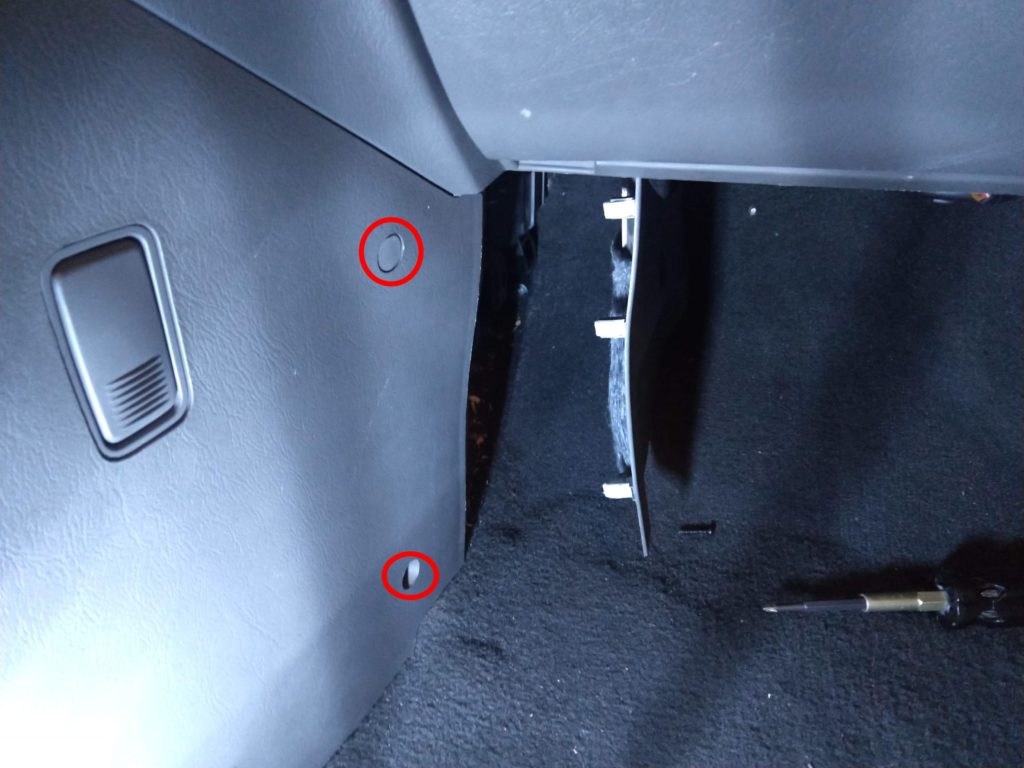
Pull front fascia away, unclipping three clips. Then loosen two screws.
Once all the screws are undone, you can remove the last section by pulling it away from the center console. There are hooks, but no clips, so it should come out fairly easily.
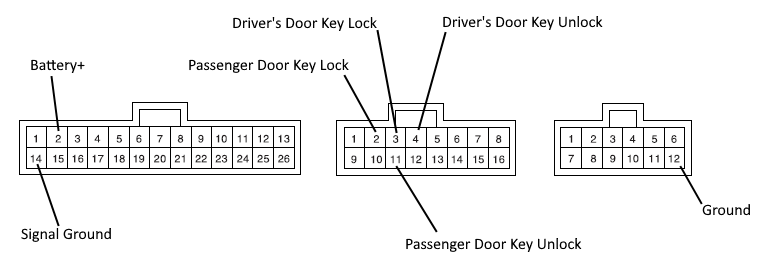
The ETACS has three connectors going into it. They are all clipped in place. The below image shows the important pins, as viewed from behind, the connector (direction from which the wires go in), when plugged in.
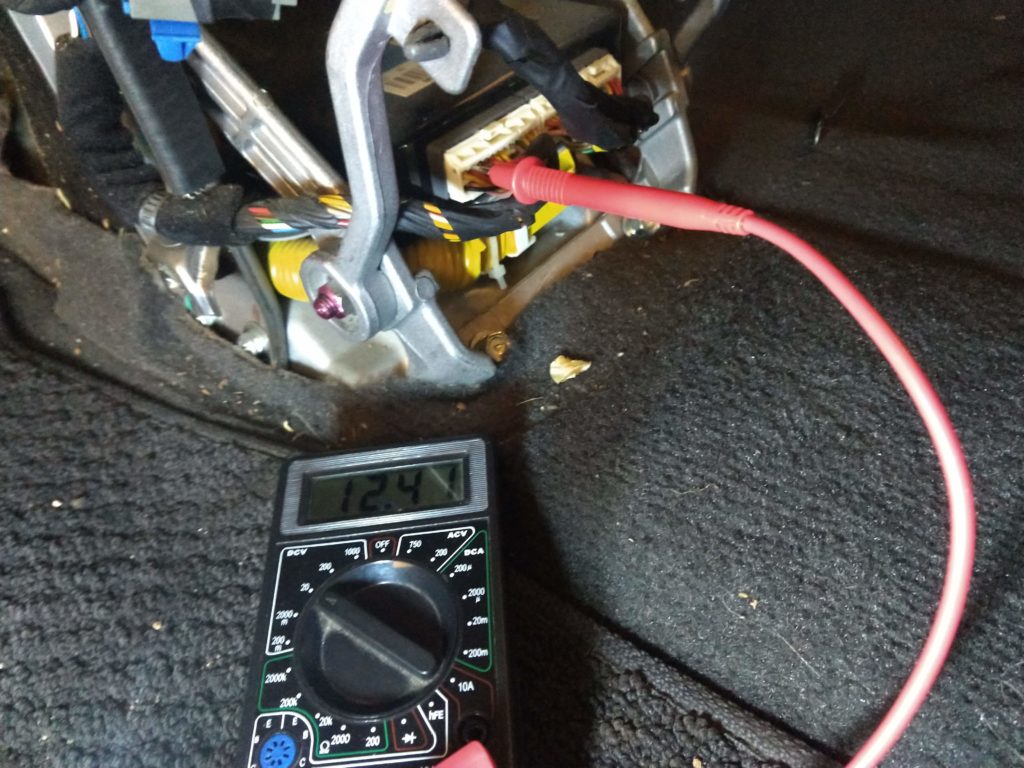
While your battery is still connected, check the voltage on each of the pins. Battery+ should read around 12.5V, while all the other ones should measure near 0V. Check for continuity between the Ground, Signal Ground and a grounded part of the vehicle. Then you can try locking and unlocking the car, by shorting the signal ground line and the applicable lock/unlock signal.
Once you’ve tested that these function correctly you should disconnect the battery from the car, and then you can unplug the ETACS to connect the necessary wires.
ETACS location with connectors
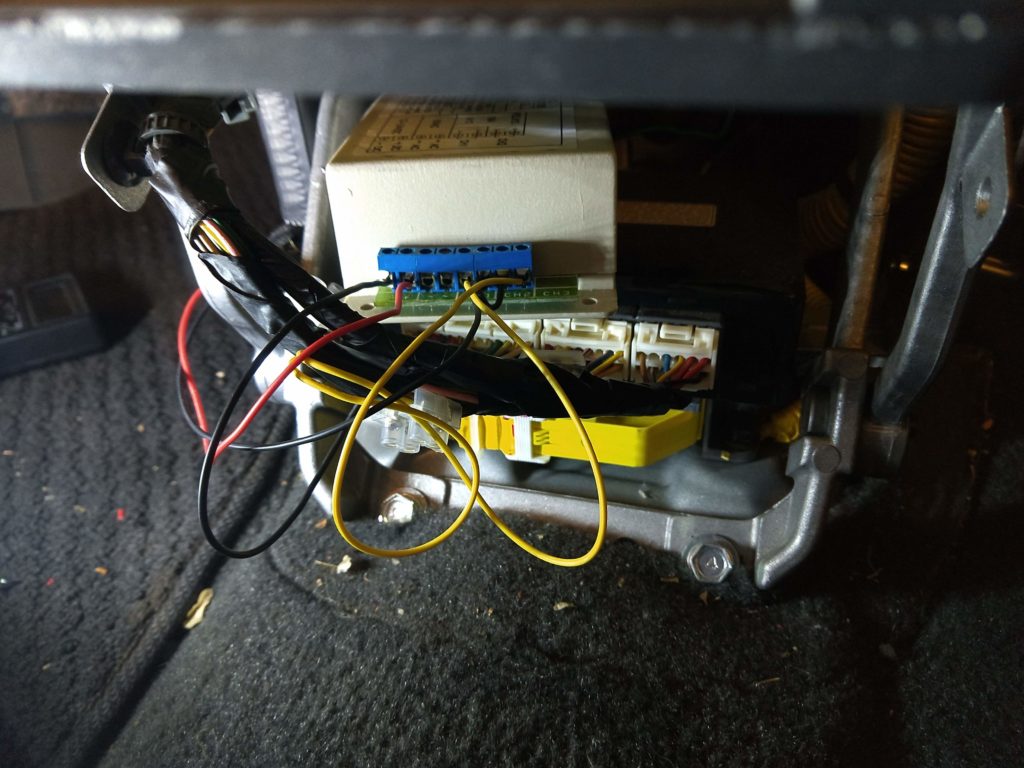
If you have the tools to solder or crimp the connections in, I definitely advise that. I used dual-row screw terminals, although I acknowledge they’re not the best option for auto use. Connect the Battery+ and ground lines to the power connection on your receiver, preferably including an inline fuse.
My receiver has two switches. Both of them are normally open, and when activated will connect two terminals. As such on the one switch I hooked up the lock and signal ground lines, and on the second switch I connected the unlock and signal ground lines.
Once connected, make sure everything is insulated, and connect it back up. Connect your battery again to test out your remote. If it works correctly, find a way to mount your receiver, using foam where applicable to prevent rattling. Add insulation to any of the wires which may rub against sharp edges.